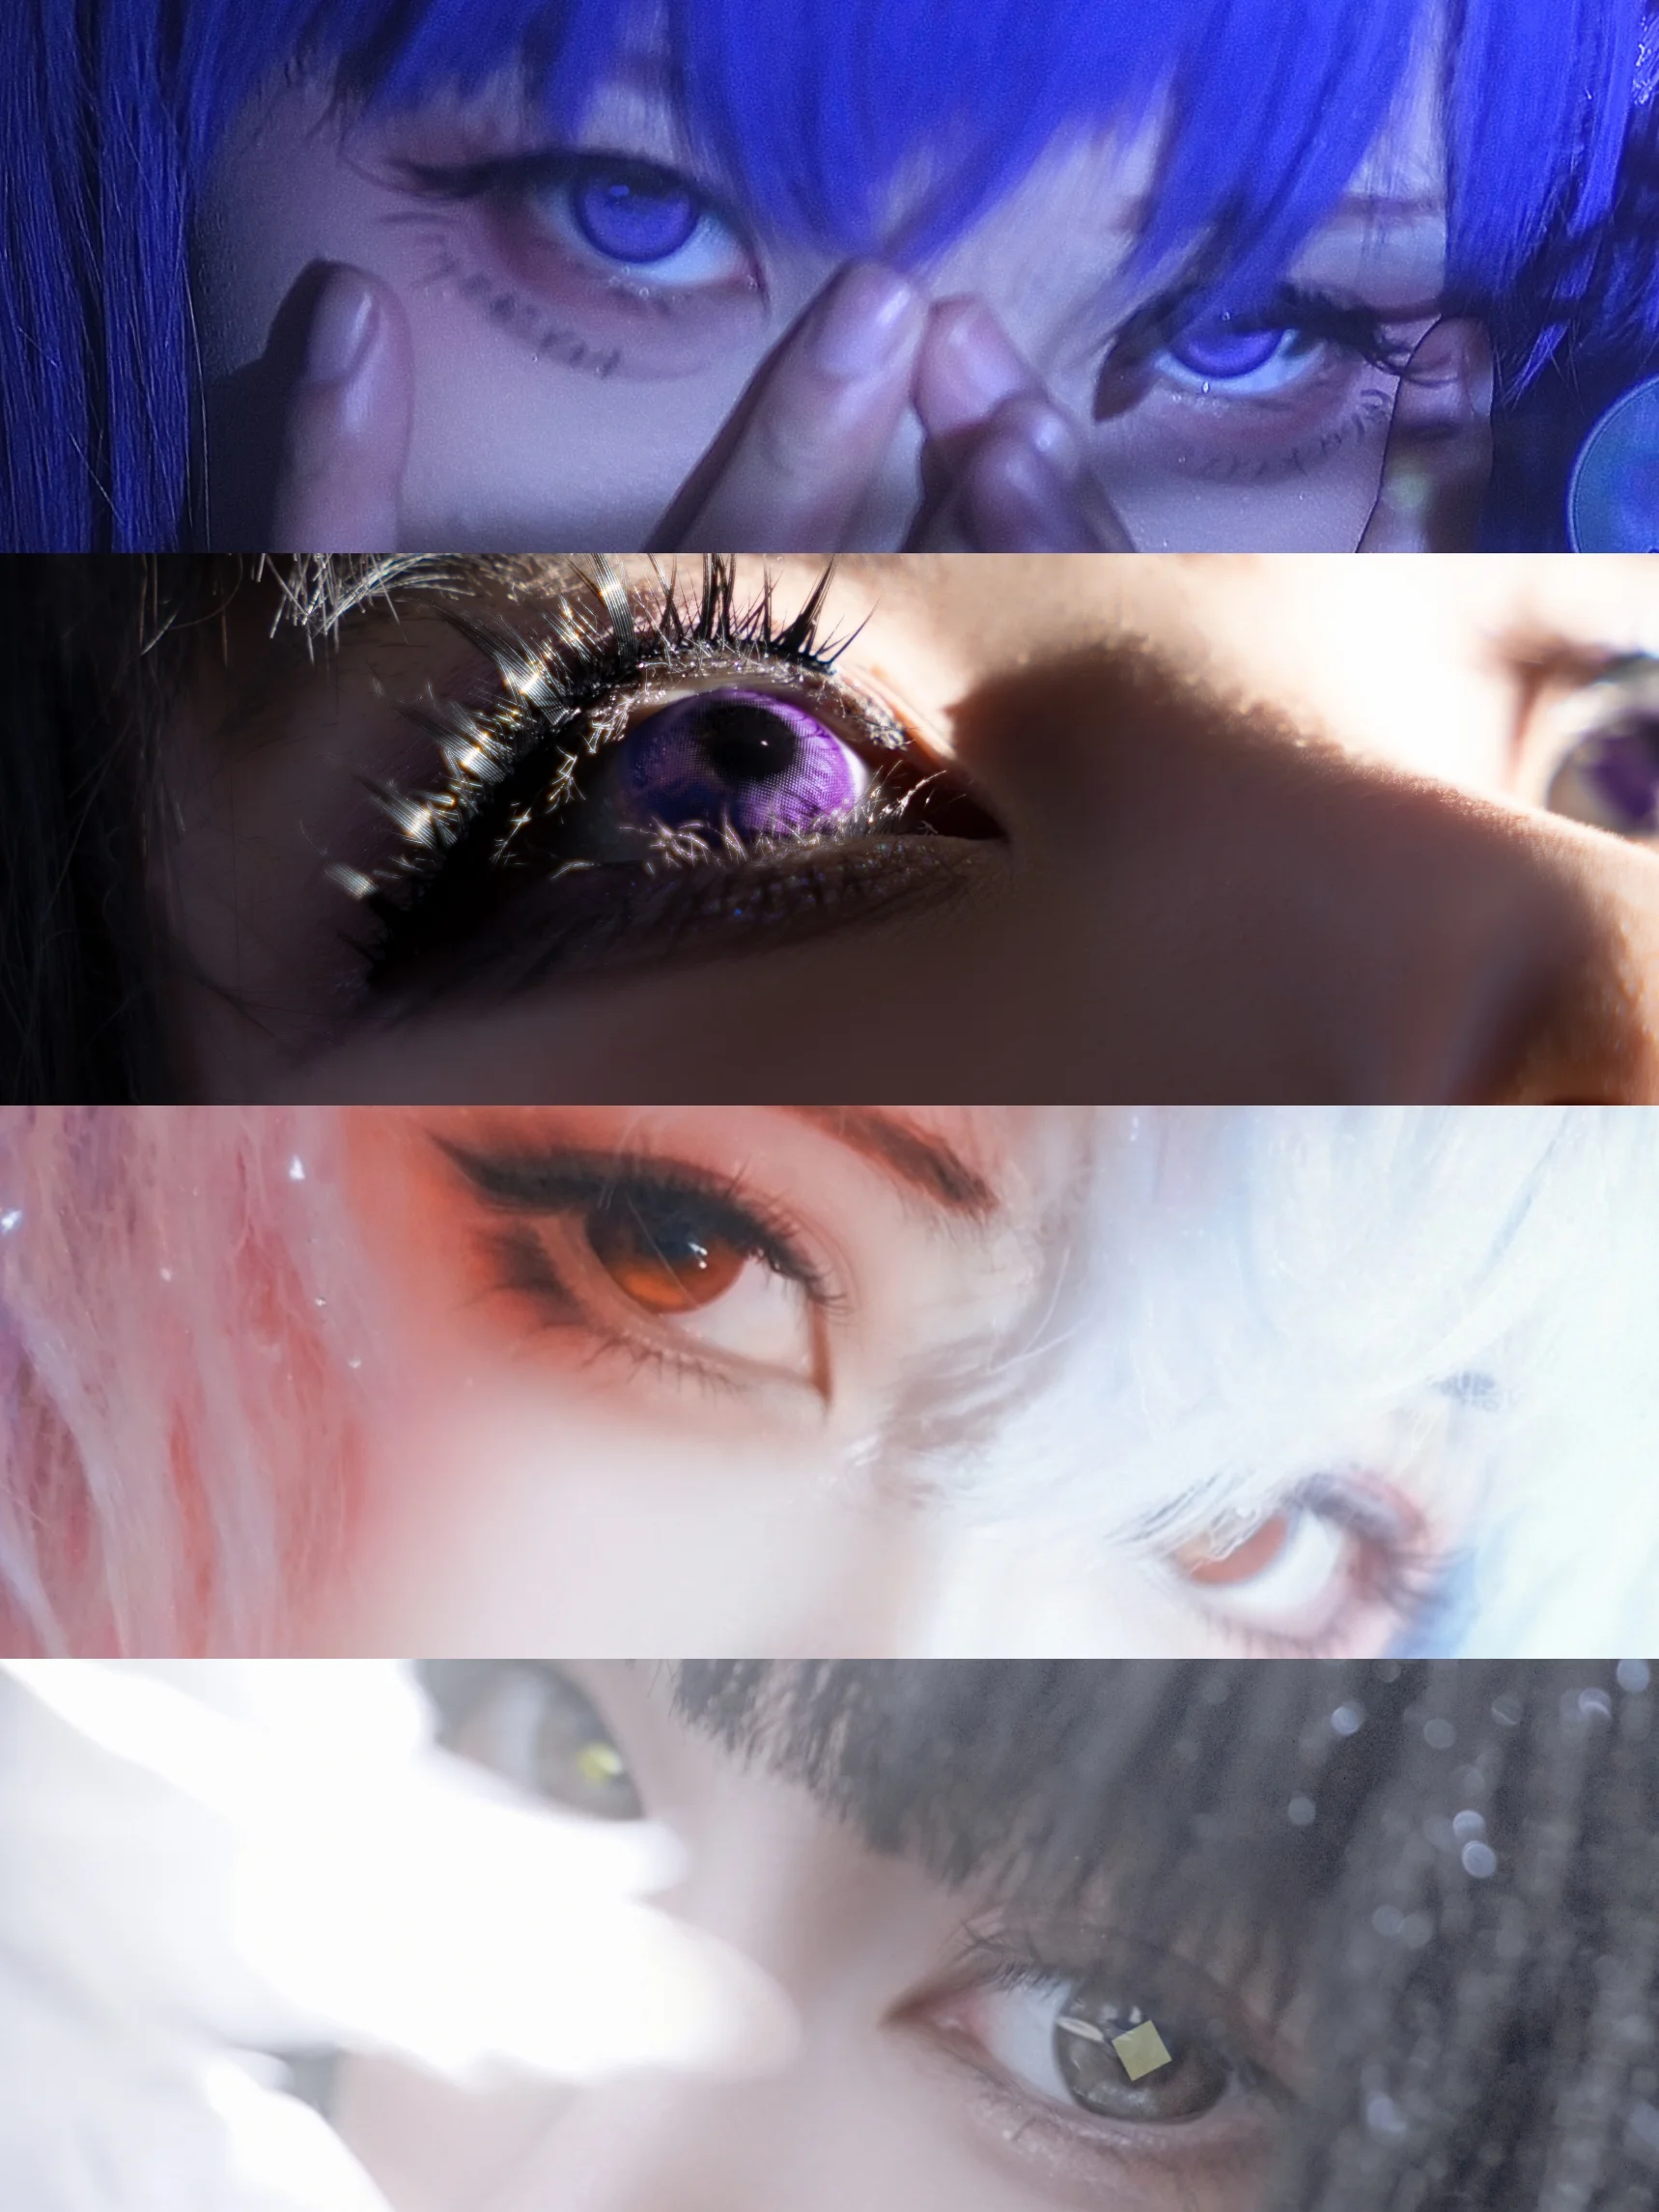
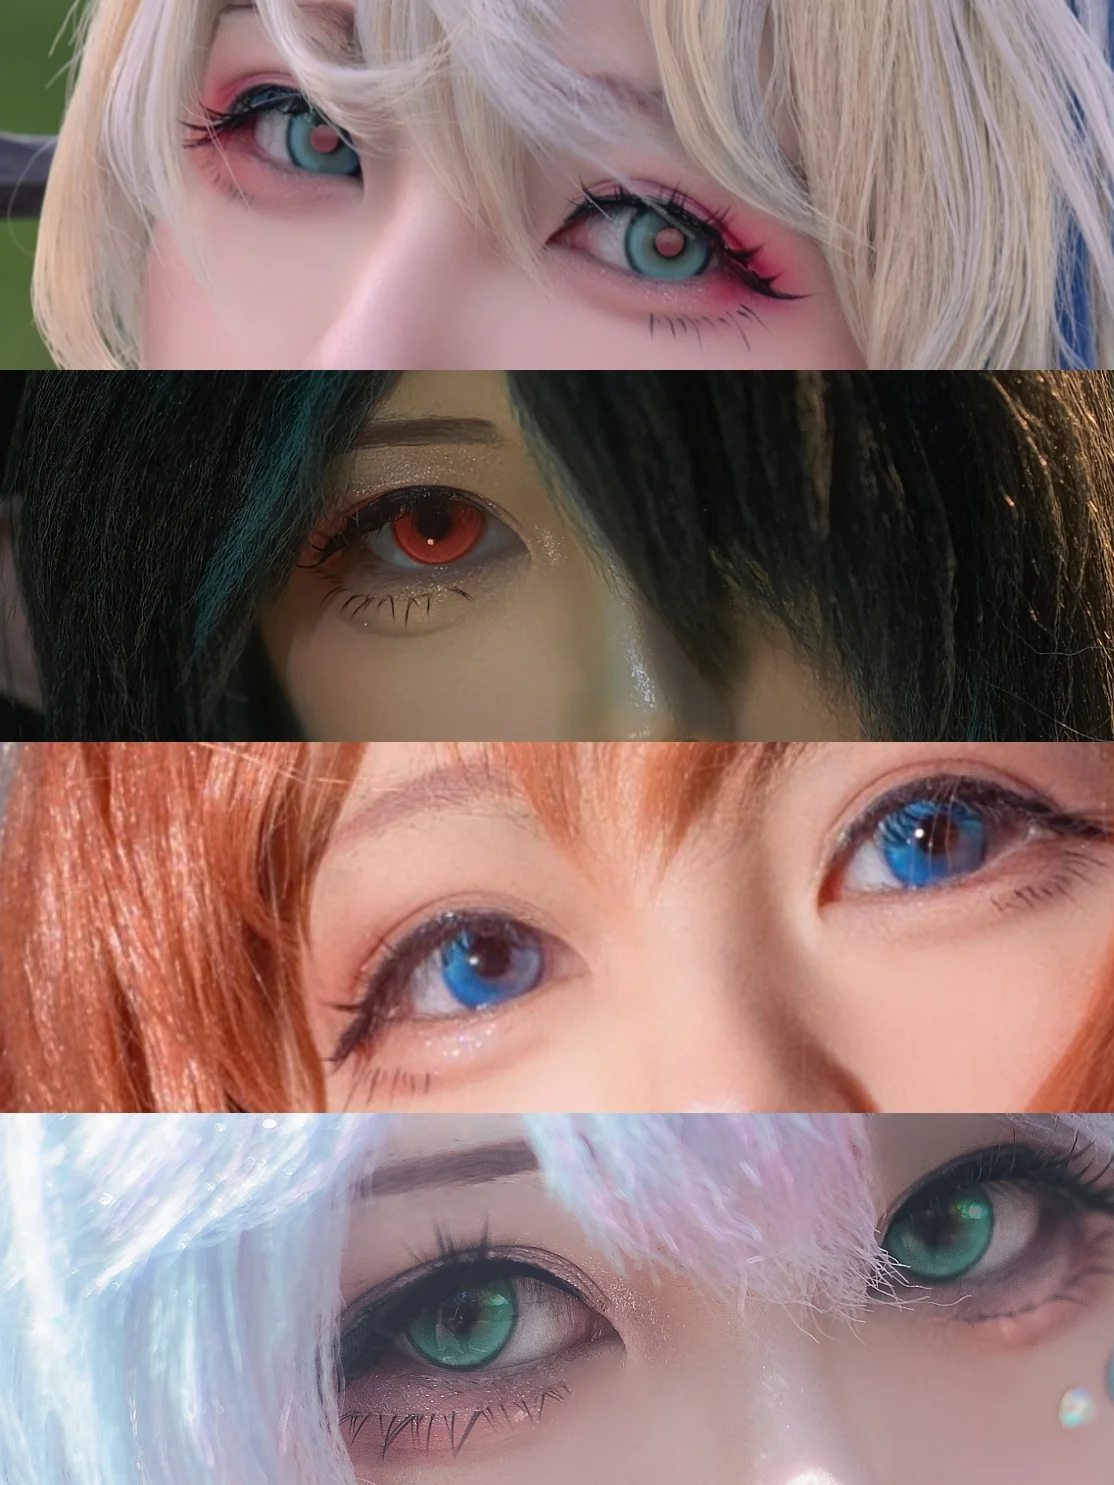
Regarding the Cosplay post-processing of these few sets of eye close-up shots, the core principle is actually choosing the right contact lenses before the shoot. However, factors like ambient lighting, angles, or the desired color being out of stock can often necessitate a post-shoot fix. This time, I’m bringing out a few close-up sets we've shot for a technical review to share some of my commonly used eye processing methods.
Let's look at the first set of images first. For Sakura's eye close-up, the highlight was slightly overexposed at the time, making the edges too harsh. If you use the Patch Tool directly to fix it, it can easily create a noticeable smudged look against the surrounding skin tone, making the edges look very strange. Therefore, after making a rough selection with the Patch Tool, I switched to the Brush Tool, sampled the base color around the eye, and gently painted over the highlight area. This way, the transition becomes much more natural, and a soft-focus effect comes through. As for Homura Akemi's eyes, because I couldn't get the purple ones in time for the shoot, I had to wear a pair of blue contact lenses. However, the pattern on these blue contact lenses was highly detailed. To change it to purple in post-processing, I first selected the eyeball and then applied a "Selective Color" adjustment, focusing on modifying the values in the blue and magenta channels. While adjusting, you must constantly pay attention to ensure that the iris texture doesn't get distorted due to the color grading. Remilia's issue was that her eyes completely lacked light; the image looked quite flat, almost like dead fish eyes. I created a new layer set to the Screen blend mode on top of this layer, used a soft round brush dipped in a tiny bit of red, and lightly dotted it underneath the pupil. Then, after adjusting the layer opacity, that watery, radiant glow instantly popped out. Arturia's was even simpler—I directly drew a diamond using Photoshop's built-in Shape Tool, placed it right in the center of the pupil, changed it to an appropriate color, and then lowered the opacity. This kind of geometric catch light drawing technique is very distinctive.
Now let's talk about the second set of images. Shu's eye was also a clever shortcut: I just used a brush to dot a red point in the middle of the pupil, then changed the layer mode to "Overlay" or "Soft Light" and adjusted the opacity. As long as the placement is accurate, it looks highly natural. Dusk's situation was very similar to Homura Akemi's—she also lacked the matching color contact lenses. I used a pinkish one because a pink base color is easy to grade. After matching the color accurately, if it felt like the saturation wasn't vibrant enough, you could create a new layer, overlay some color onto the iris with a brush, and adjust the layer mode to increase the color density. Lin's close-up actually barely required any post-processing because the lighting at the time was so incredible, revealing a crystal-clear, translucent texture. Thus, her eyes relied entirely on the practical lighting cast during the photoshoot. For Robin's eyes, I added a catch light. After drawing an abstractly shaped highlight, it was the same old routine: adjusting layer modes, modifying opacity, and trying out a few different effects until finding the one that best matched the character's vibe.
In conclusion, saving eyes comes down to repairing highlights, precise color grading with Selective Color or Curves, and drawing your own catch lights and point light sources. The ultimate core is to make good use of layer blending effects. I highly recommend everyone try options like "Screen," "Overlay," "Soft Light," and "Vivid Light" in the filters gallery and layer styles. Different modes combined with opacity changes will yield entirely distinct visual experiences. As for the previously mentioned contact lens selection, it is indeed crucial. I will be releasing a dedicated post in the near future to share a contact lens color grading tutorial on how I choose contacts based on character settings and lighting conditions. I'll cover dimensions like patterns, diameter, and base curve, hoping to give everyone some troubleshooting tips to avoid common pitfalls. That's all for this share, and I hope these specific operational ideas can help resolve your minor post-processing eye headaches.