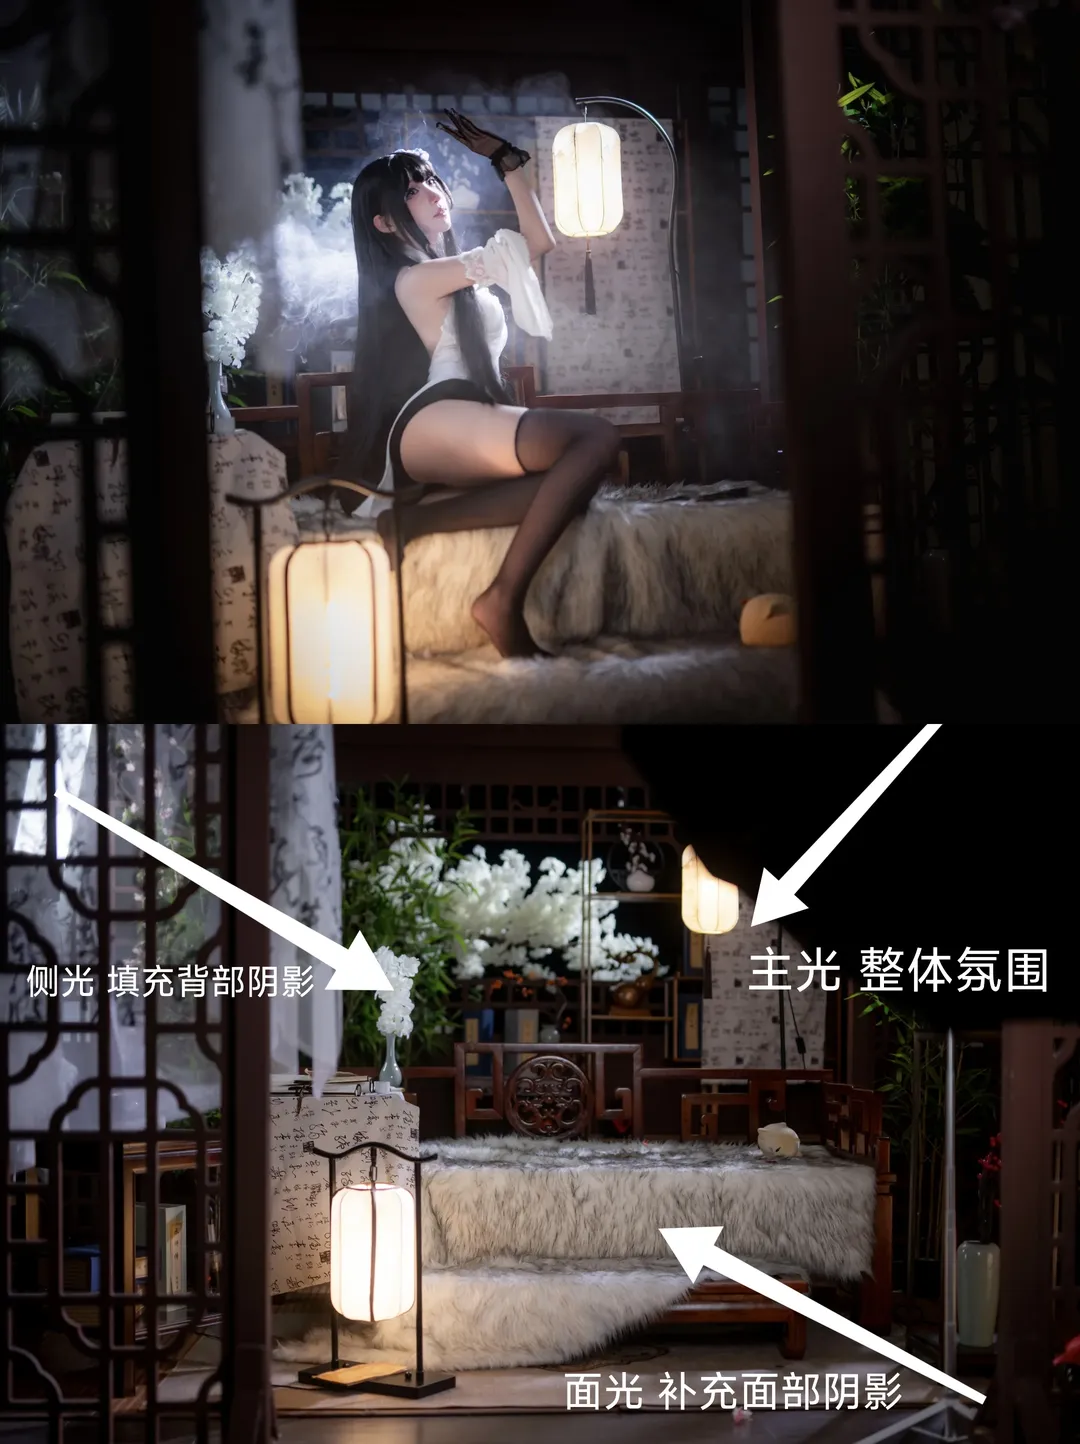
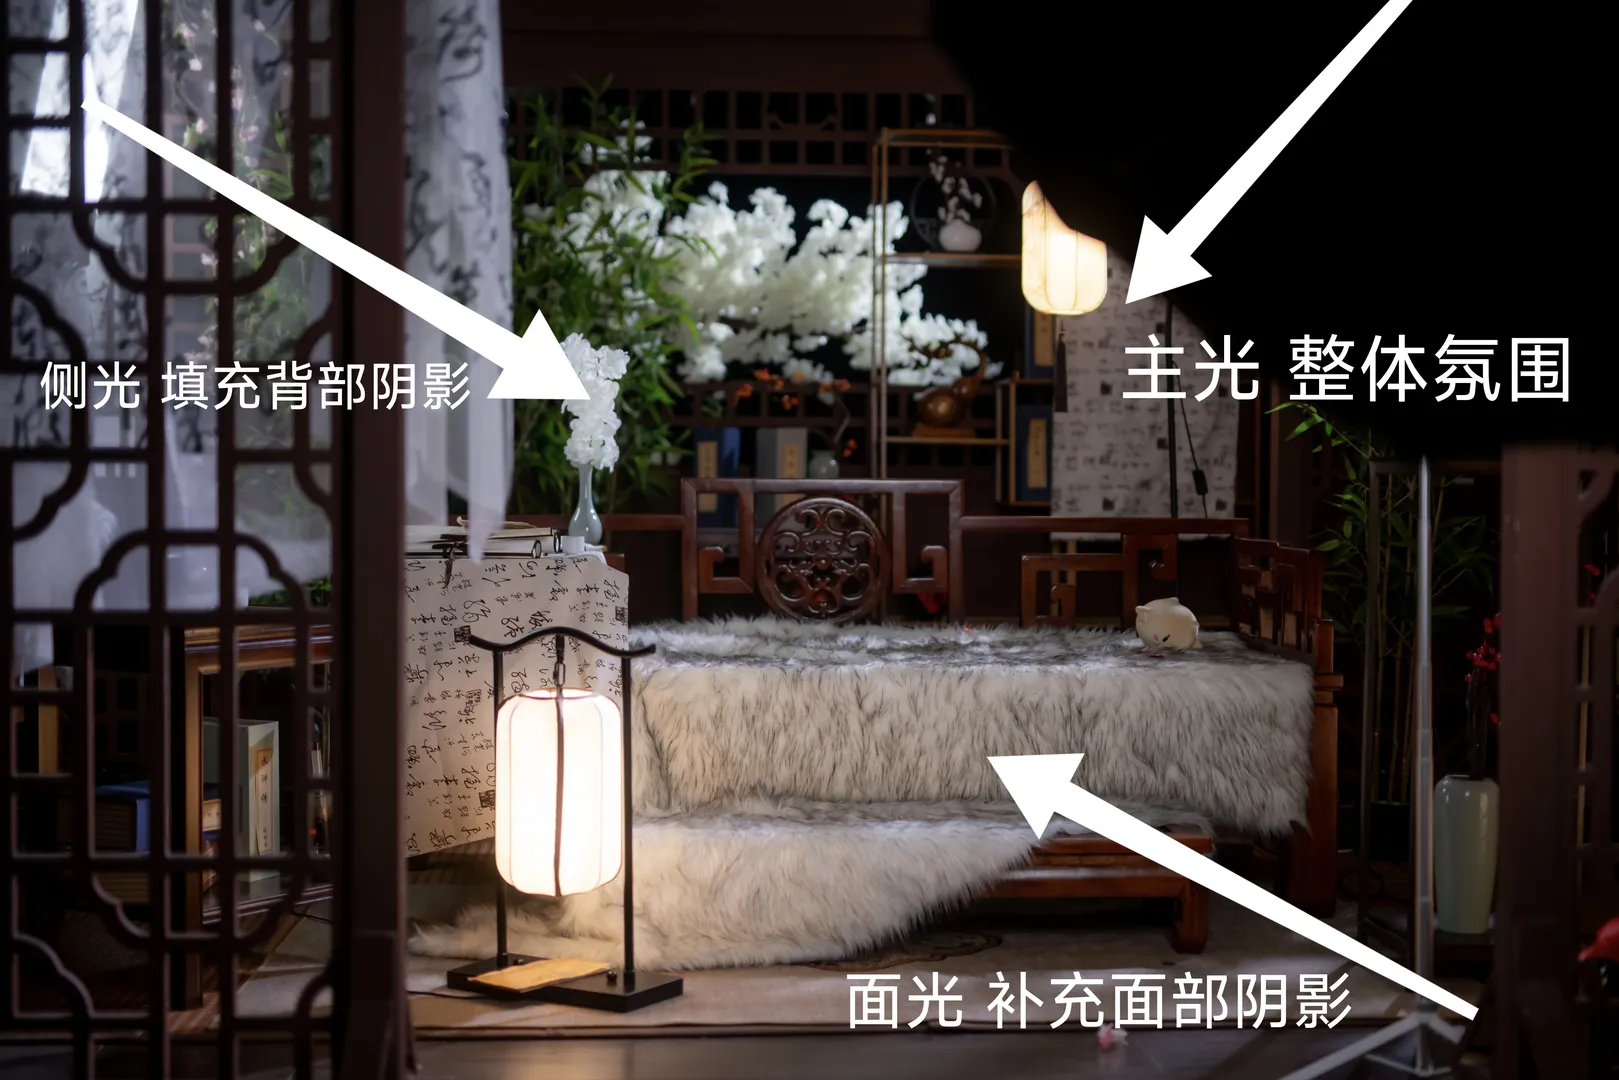
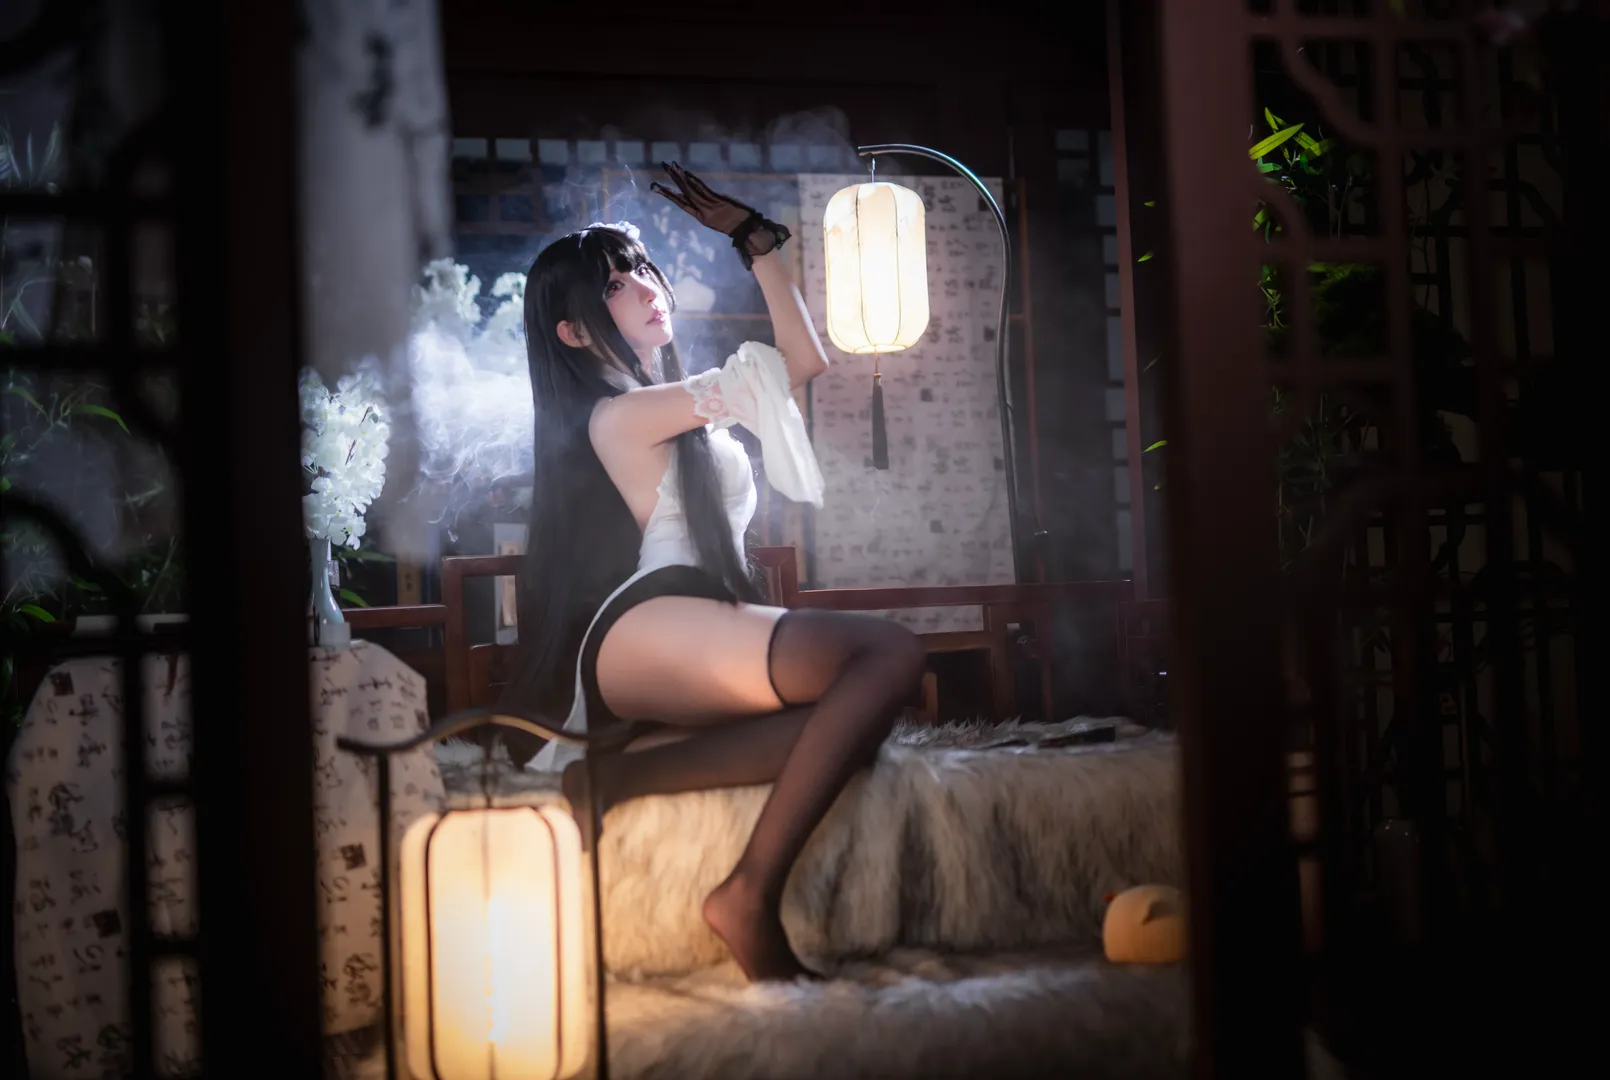
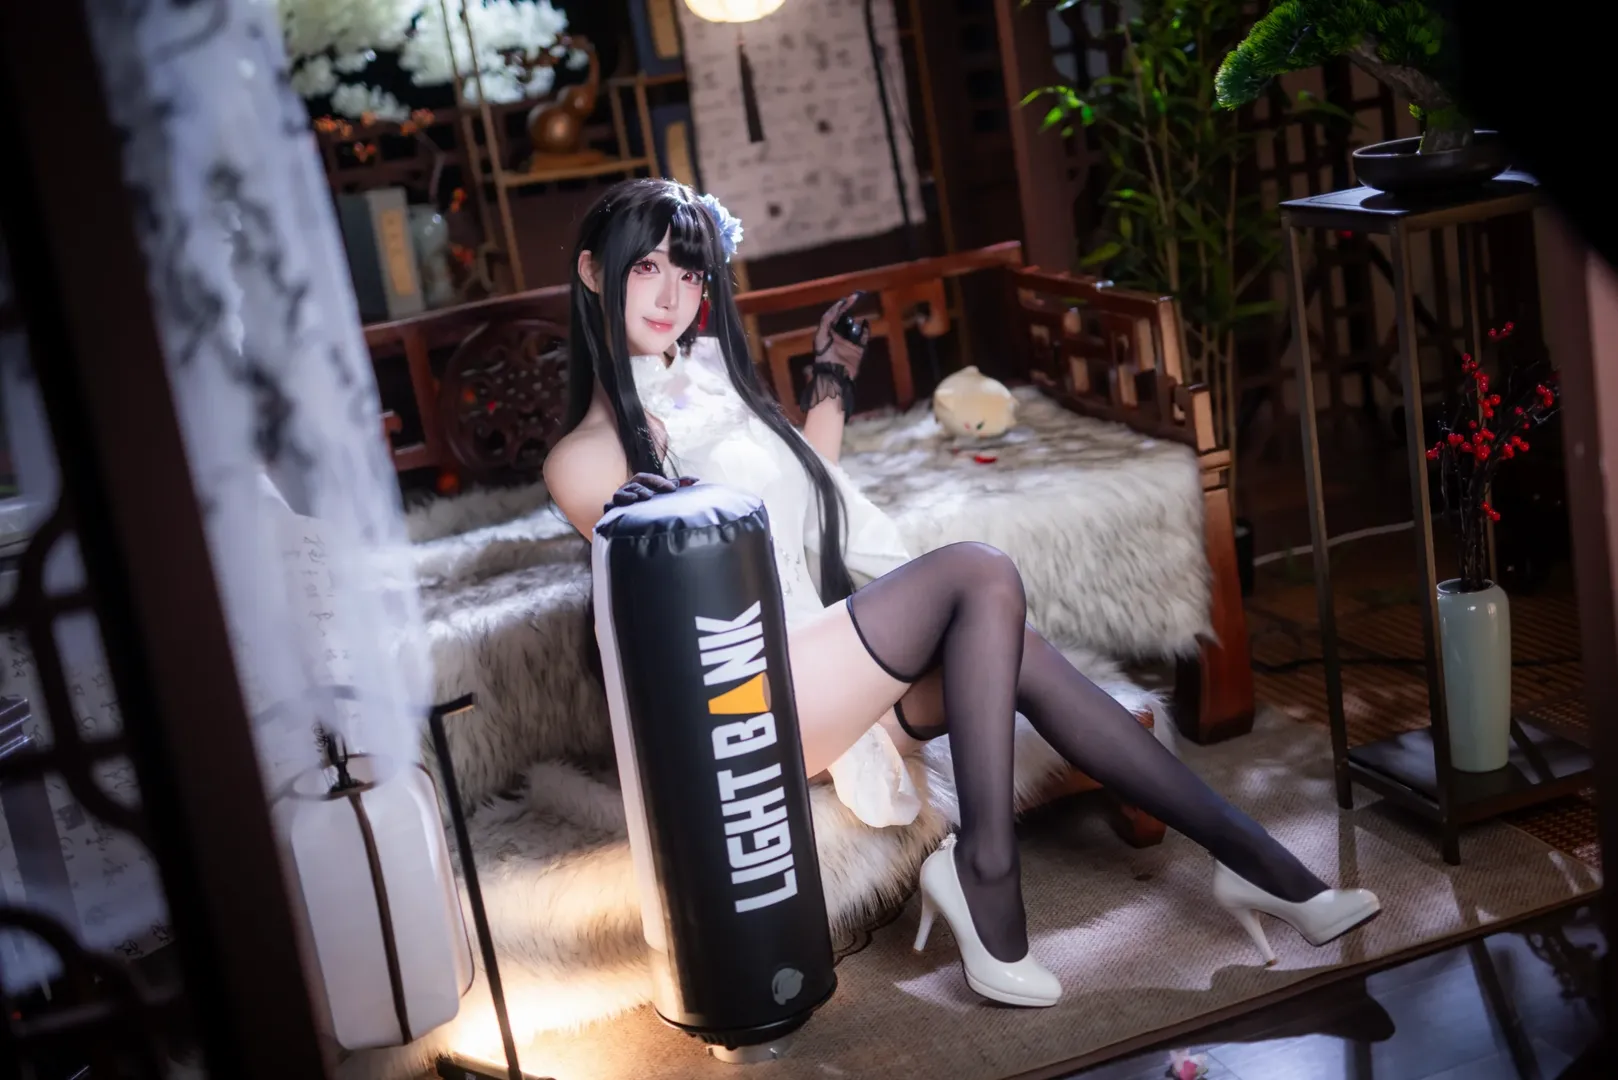
For this shoot, I specifically organized the lighting breakdown, with the scene setup centered around a New Chinese style scholar's study atmosphere. Three primary lights were used, responsible for the overall base tone, facial details, and rim lighting outline respectively. You can check the final result in photo 3, and the lighting setup is marked in detail on the diagram.
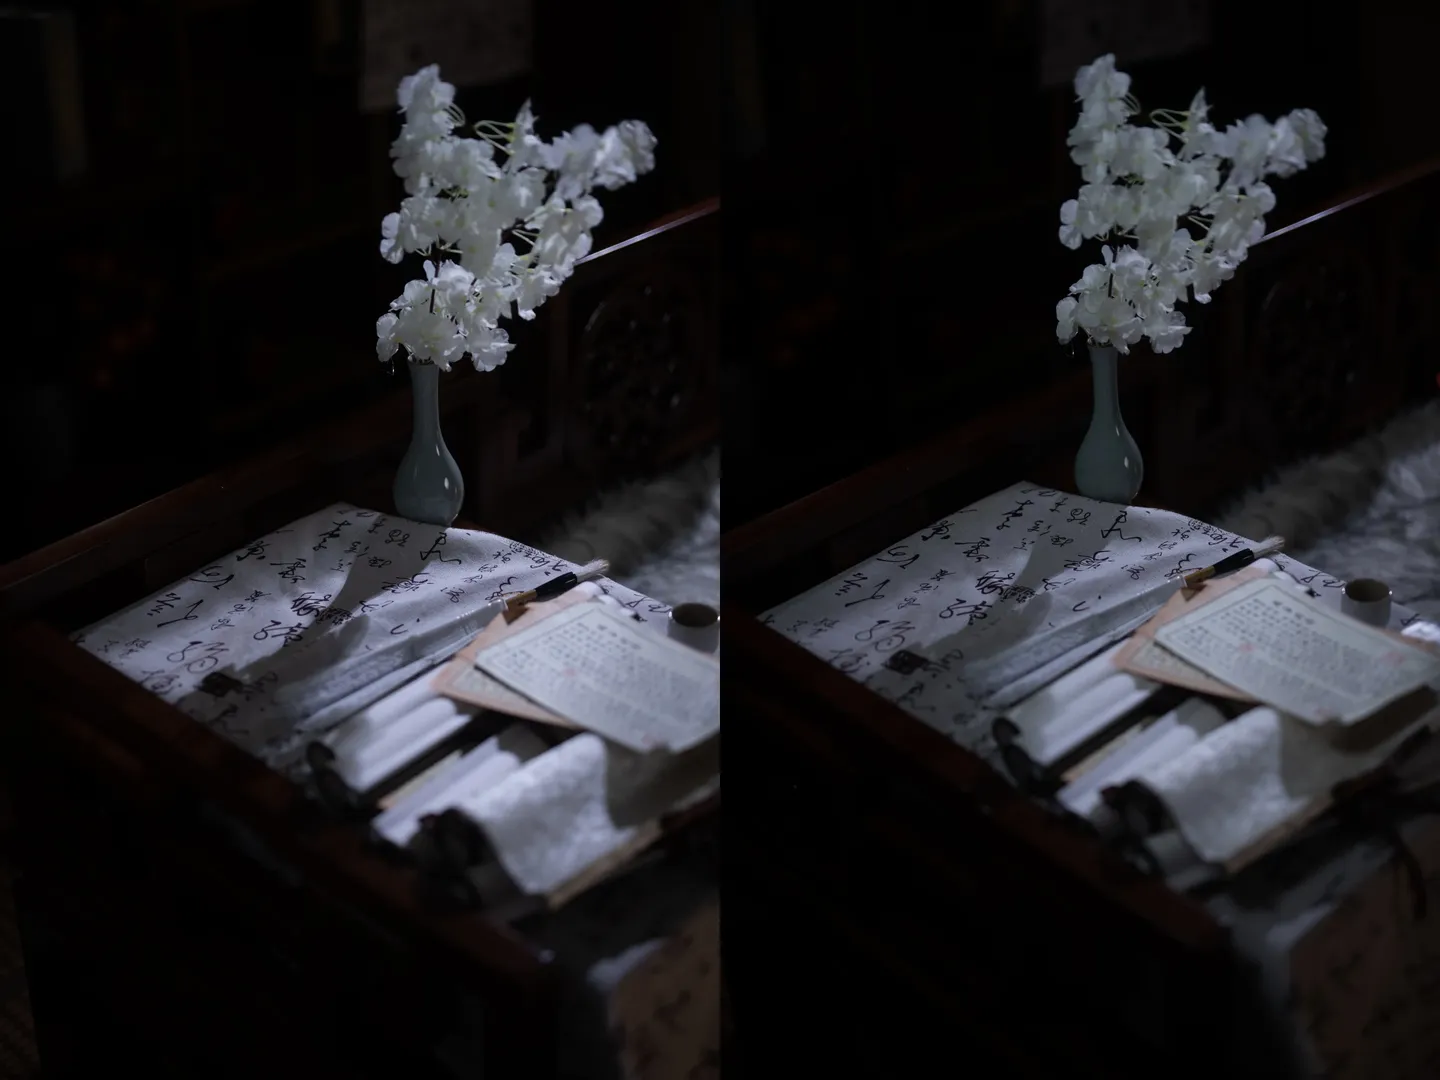
Let's start with the key light for creating the overall atmosphere: I chose a standard reflector placed overhead as top light. This light position is crucial—unlike blunt frontal flat light, it cascades down from above. Paired with haze effects, it thoroughly brings out the texture of the Chinese wooden furniture and white plush daybed. The hard light characteristics of the standard reflector combined with smoke tablets create a mottled yet hazy authentic light-and-shadow feel in the environment, easily drawing the audience's emotions into the scene.
Next is the key fill light for facial shadows, where I used a 90cm deep parabolic softbox. Since the primary light comes from top to bottom, without this facial fill, the subject's facial features—especially the lower face—would drop into shadows that are too deep, and catchlights in the eyes wouldn't be clear enough. The advantage of a 90cm deep parabolic softbox lies in its relatively focused yet soft light, which won't wash out the light-and-shadow structure formed by the overhead light, while effectively lifting the face out of the shadows to keep the features clean and dimensional.
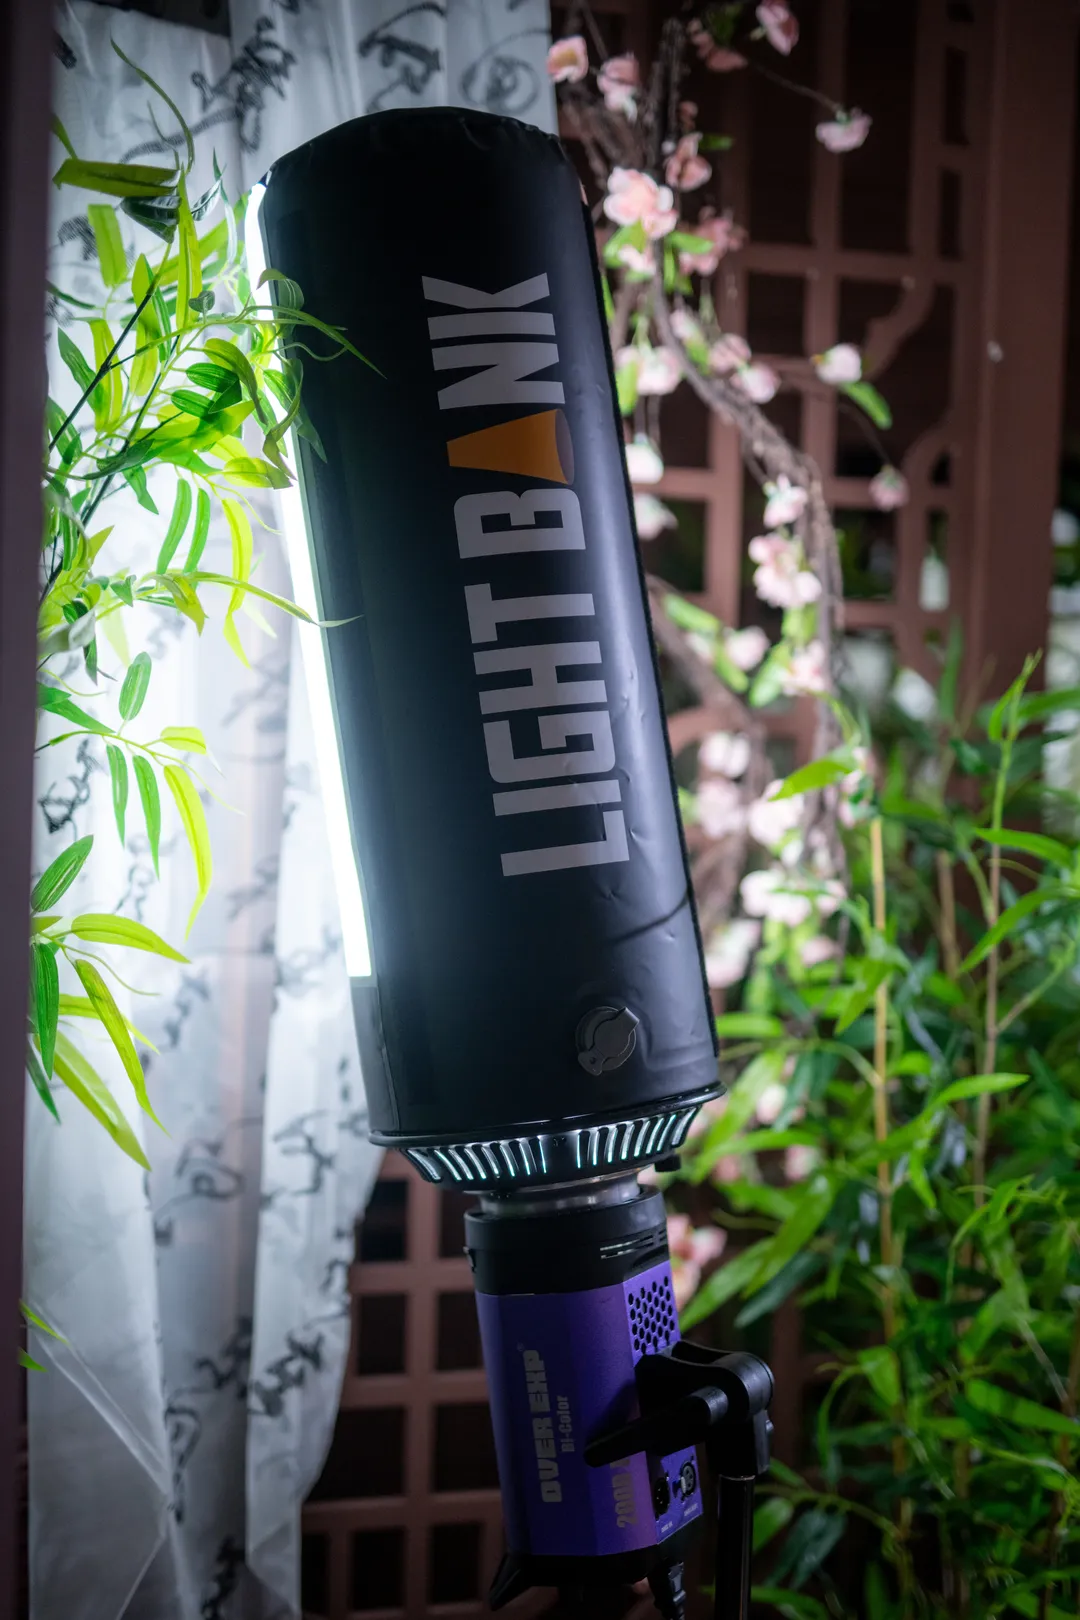
The third light is the rim side light that I want to highlight in this post. On the side, I experimented with a Feimian 60 inflatable soft light pillar, used to simulate the texture of a localized close-up light source hitting the body, beautifully accentuating the rim outline of the body and hair. Take a look at the comparison in photo 6: before turning on this inflatable column, the model's back and hair strands directly merged into the dark background, making the depth flat. After turning it on, the side light "peeled" the subject away from the dark background, instantly boosting the dimensional presence.
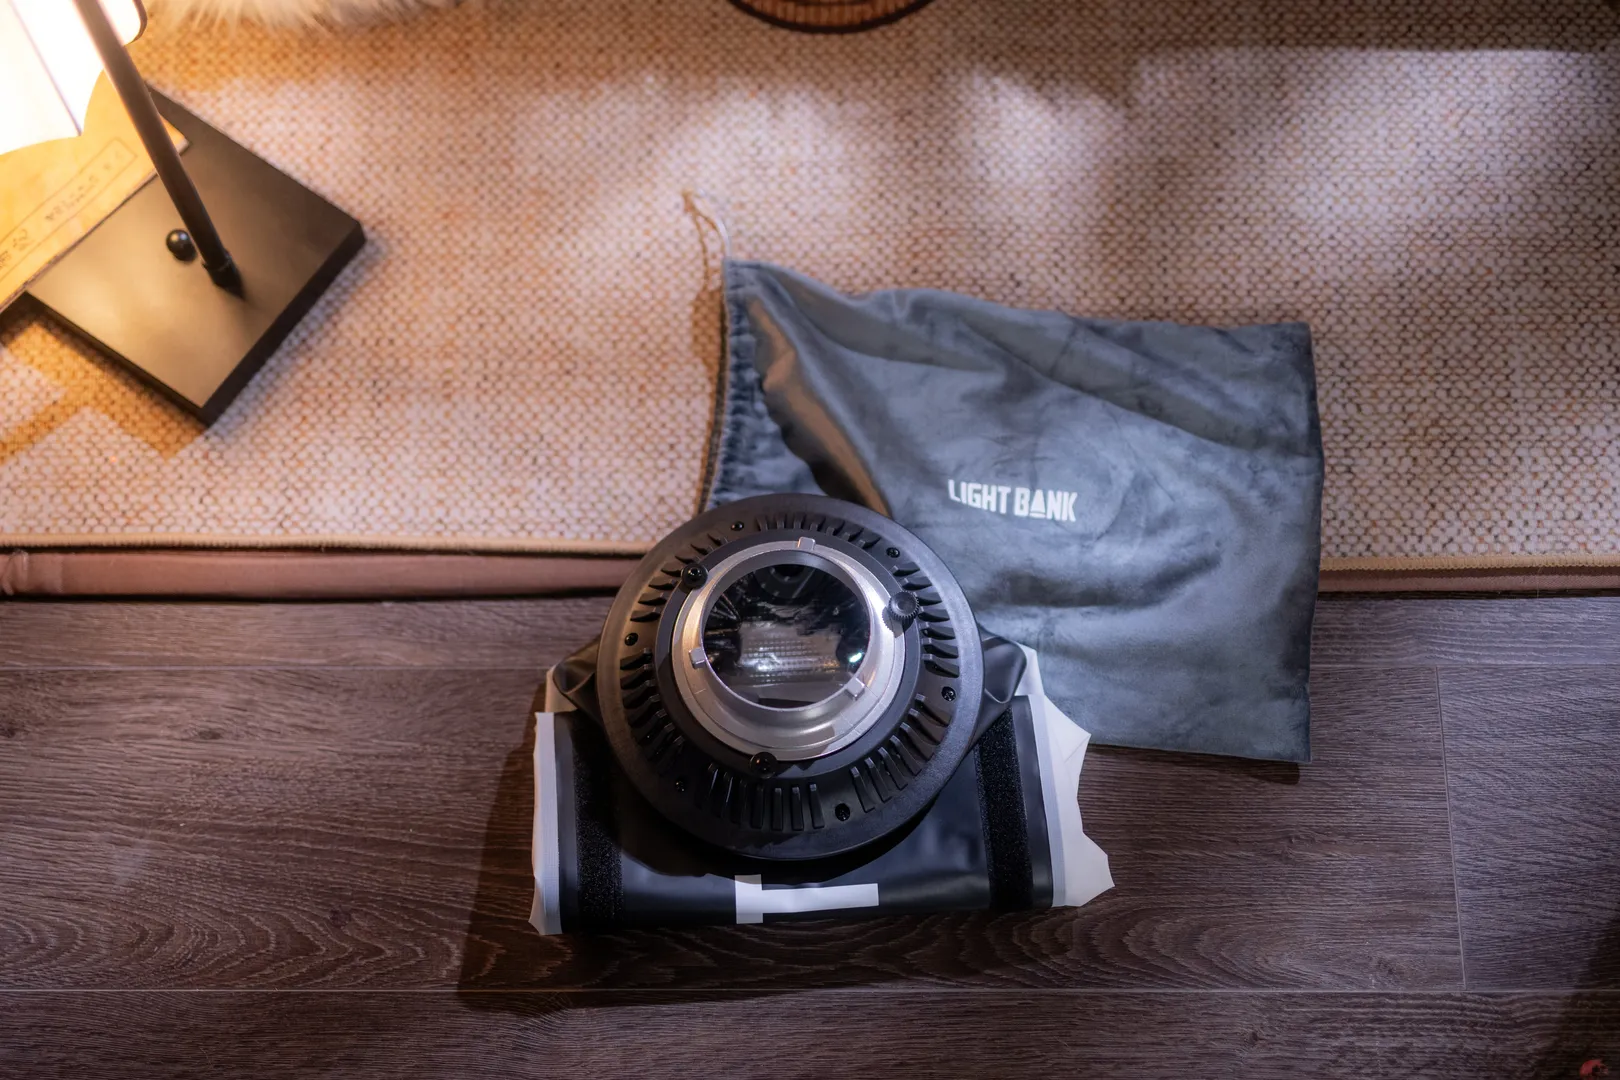
In the past when shooting rim side silhouettes, I used to rely on a 30x120 strip softbox. However, that equipment had a fatal pain point: it was too long, making carrying and storage extremely inconvenient—especially in tight studio spaces or on location shoots, it was a real hassle. The Feimian 60 inflatable soft light pillar folds down remarkably small; as you can see from photo 4, its folded volume takes up almost no space in a gear bag. Once inflated, its luminous surface is large enough and the light is soft enough to handle rim lighting tasks effortlessly.
Regarding scene setup and prop coordination, beyond this lighting setup, details like bamboo leaves, wooden daybeds, and calligraphy scrolls contributed to atmosphere building. For styling, a white modified Qipao top and black bottom shorts were intentionally selected; the white cuffs conveniently reflected ambient bounce light, making the key, side, and facial fill lights show even more clearly on the clothing. The color tones of the stockings and gloves delivered rich texture under warm-toned light, low-key yet refined.
When shooting studio portraiture with an Oriental aesthetic, mastering the restraint and release of light is essential. A standard reflector spreads light wide, while a light pillar focuses it tight. Sometimes giving light and shadow room to breathe while retaining subtle shadow transitions yields a far more enduring look than illuminating every single corner. The black inflatable soft light pillar used here also served as a great visual anchor during setup—standing in the studio, the equipment itself turned into an interesting backdrop element.
The haze volume on the shoot day was controlled just right, giving form to light beams without overwhelming the subject. When doing atmospheric studio photography like this, try using door frames or folding screens as foreground framing in front of the camera to boost depth of field. Once the final shots came out, this lighting logic proved highly effective for classic/traditional aesthetic elements—the overall texture was solid, transparent, and spacious, entirely free of the cramped feeling common in indoor studio shoots.
I hope this Photography equipment sharing and lighting tutorial breakdown offers useful insights for peers and enthusiasts exploring traditional style, New Chinese style photography, or cosplay photography. By utilizing light positions and modifiers wisely, fine-tuning directions, and devoting time to small details, you will naturally discover how light best serves character styling in every frame.