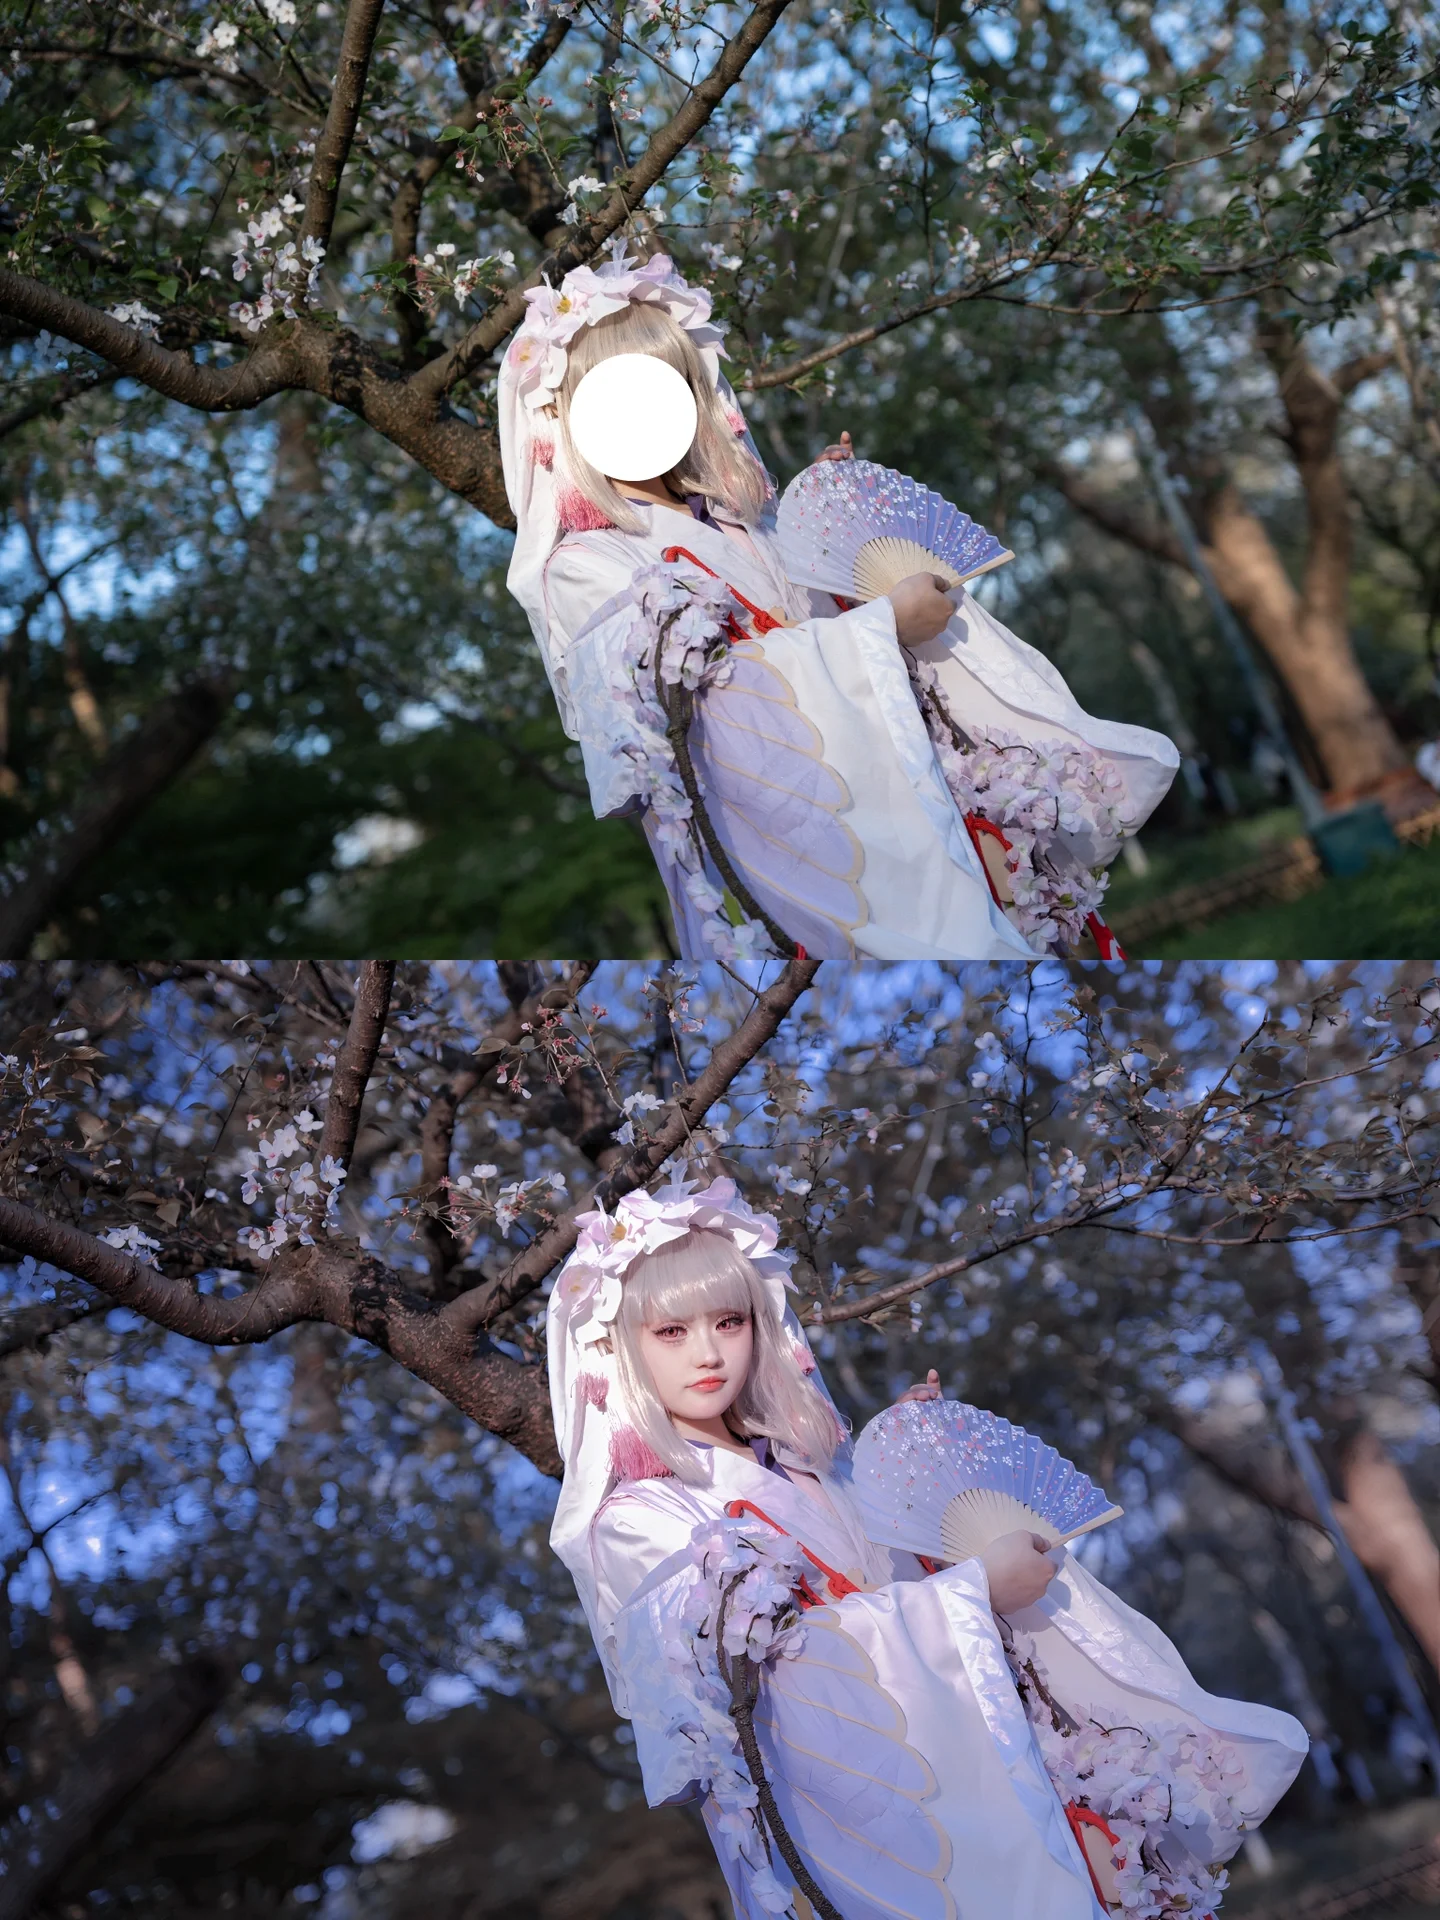
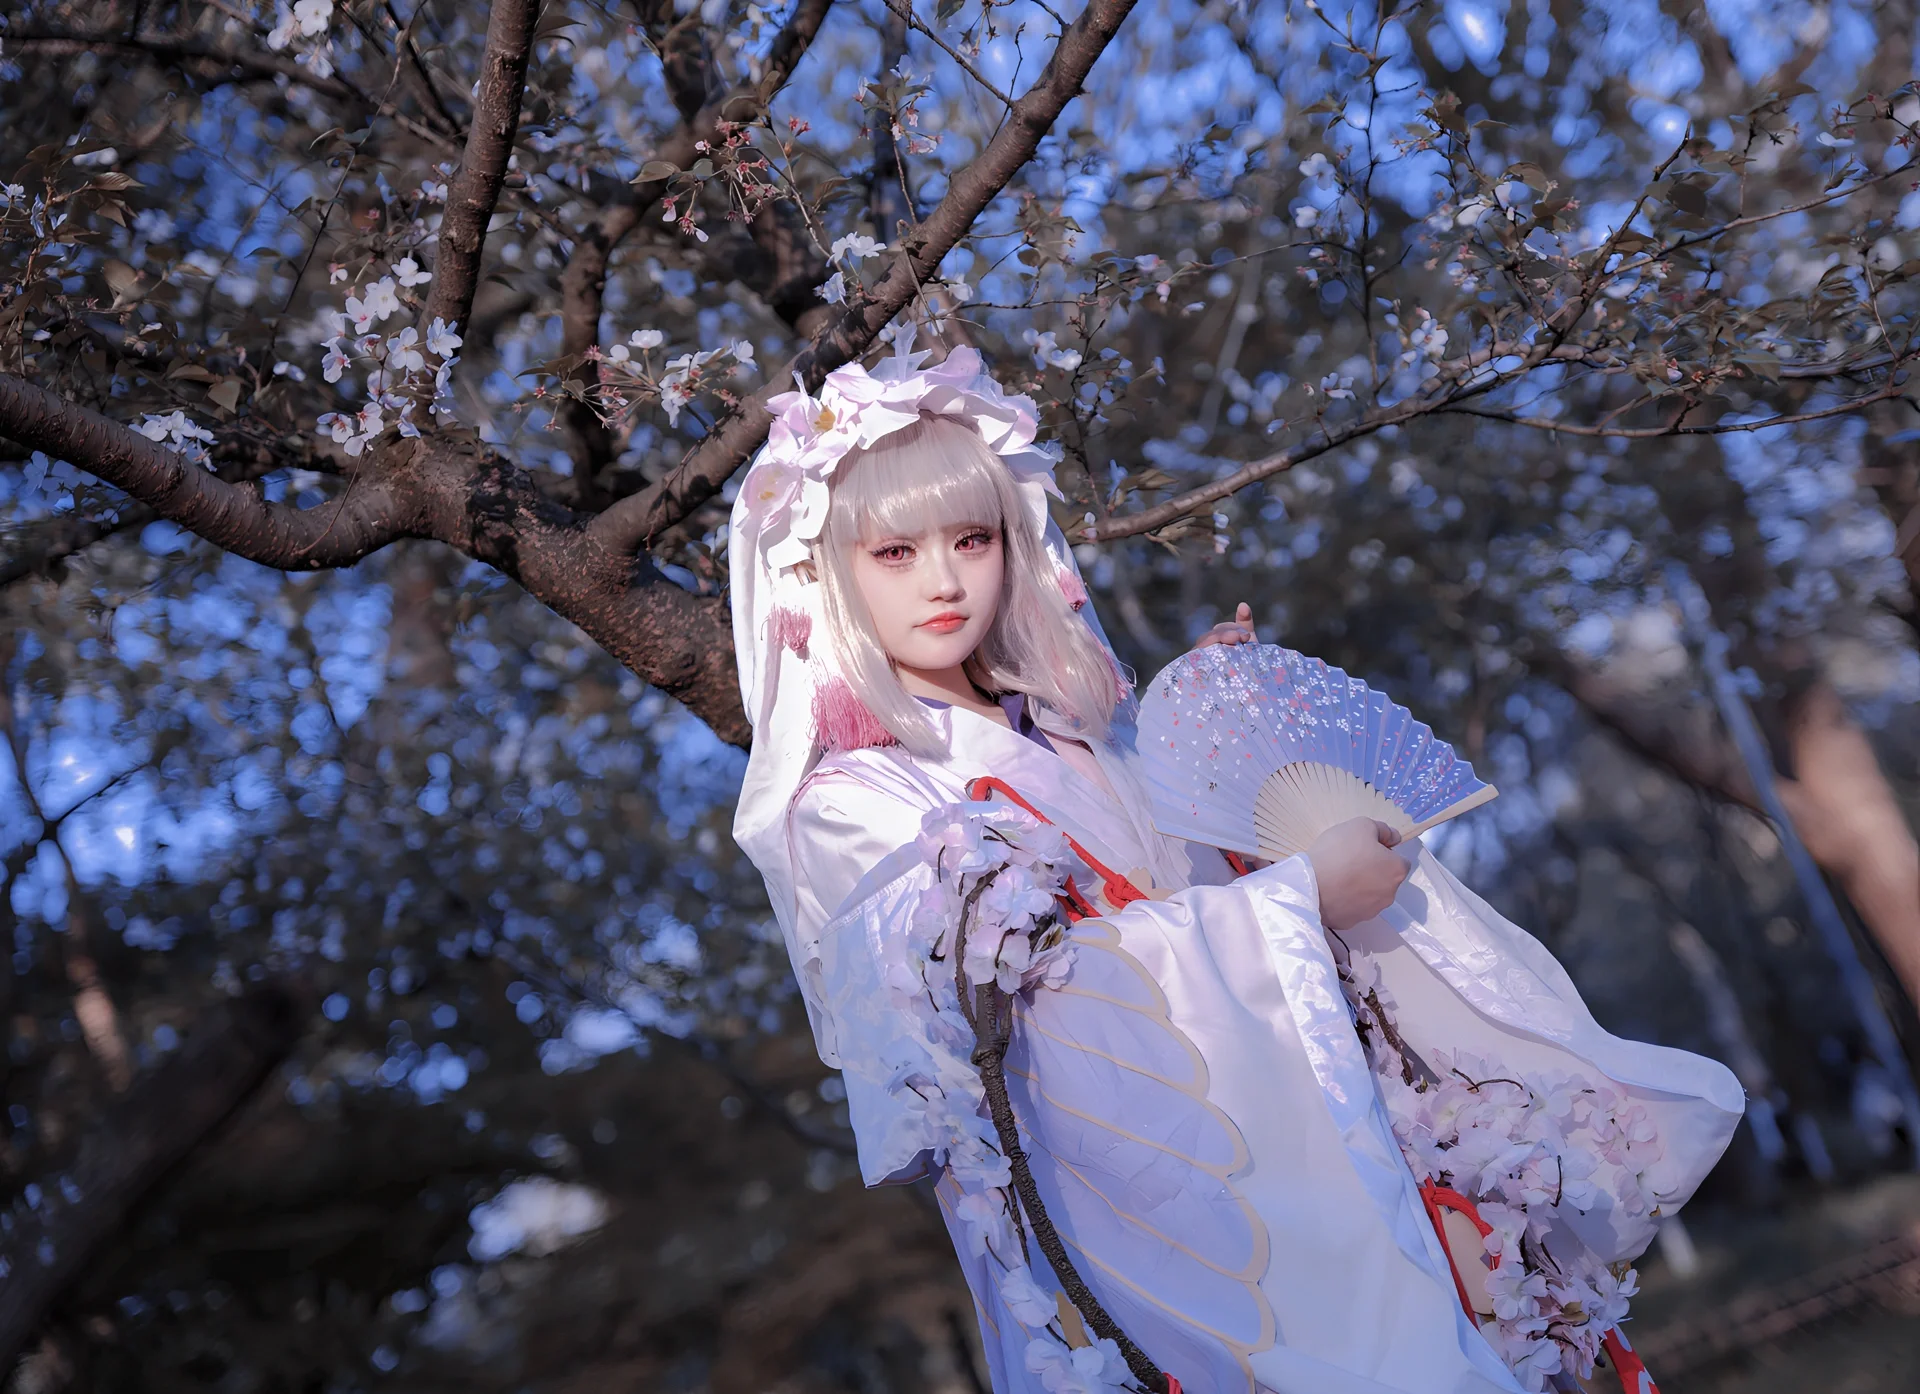
After wrapping up this Spring outdoor photoshoot, many friends asked about my color grading process, so I compiled this breakdown sharing my filter settings for easy reference. This edit relies primarily on Mobile color grading via the Xingtu app to craft the overall color atmosphere, featuring two layered filters and localized facial lighting adjustments.
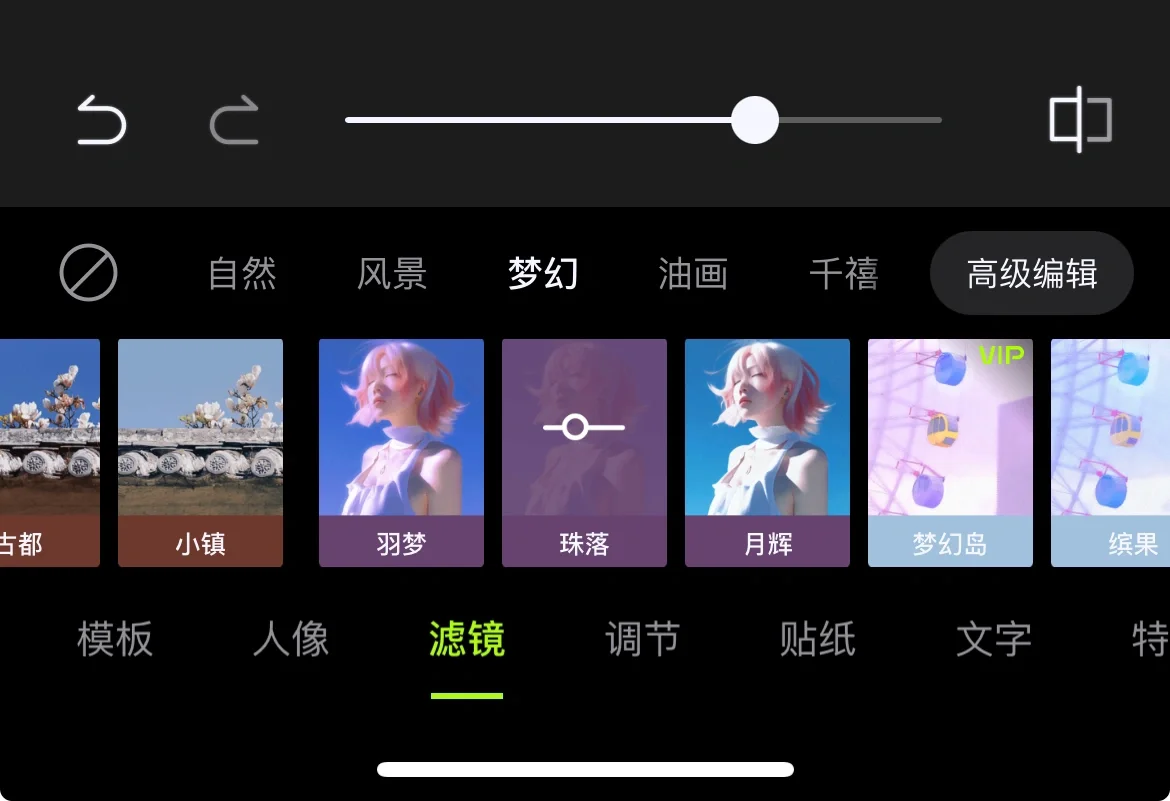
The original shot was taken under outdoor natural light, which was fairly diffused due to dense tree branches. Step one was applying a base filter: I chose "Zhuluo" (Falling Pearls) from the Fantasy category at 70% opacity. This Xingtu filter has an inherently clean, cool undertone, which helps outdoor shots—especially those with blue sky—quickly shed visual clutter and achieve a misty, ethereal aesthetic.
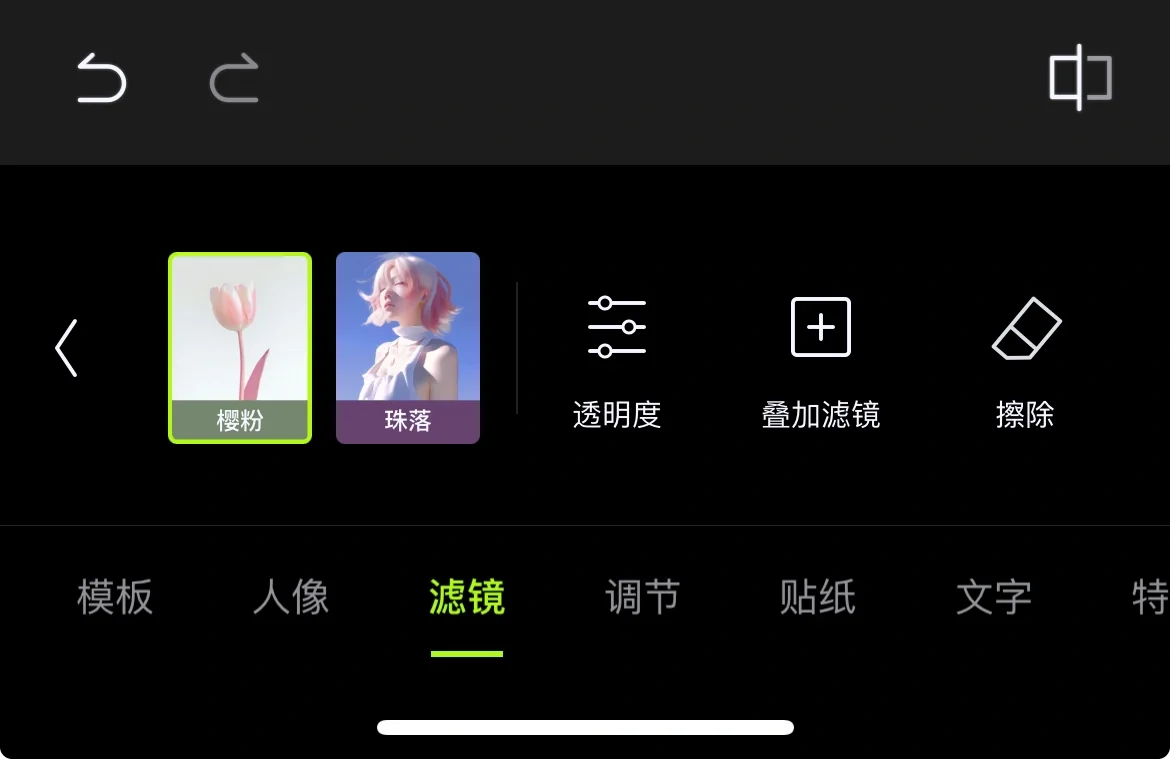
Step two involved layering a second filter in advanced edit mode: "Yingfen" (Cherry Pink) at 50% opacity. Since "Zhuluo" leans cold, using it alone can make skin tones appear washed out or greenish. Layering "Yingfen" neutralizes this chill, infusing soft warm tones along the edges and costume details so the white Japanese-style outfit and wig look gentler without distorting the floral branch colors in the background.
Step three was crucial parameter fine-tuning. In the adjustment panel, I reduced Light Sense by -10 and Exposure by -10 to suppress harsh sunlight leaking through branch gaps and prevent blown-out highlights. To emphasize the crisp texture of the white garment, I bumped Contrast up by +15, adding clear depth between clothing and background shadows. Dropping Saturation by -10 toned down yellowish greens on foliage, lending the character and blossoms an airy, magical presence. Increasing Highlights by +20 enhanced hair sheen, while dropping Shadows by -15 kept dark areas rich without crushing details, preserving fine wig strands.
Lowering Temperature by -10 and boosting Tint by +40 was a decisive move. Dropping temperature makes blue skies pop, while increasing tint shifts the balance toward magenta. This combination is iconic for Japanese-style outfit color grading, bestowing skin with a rosy-white glow and transforming white garments and pale pink blossoms into an anime illustration-like texture.
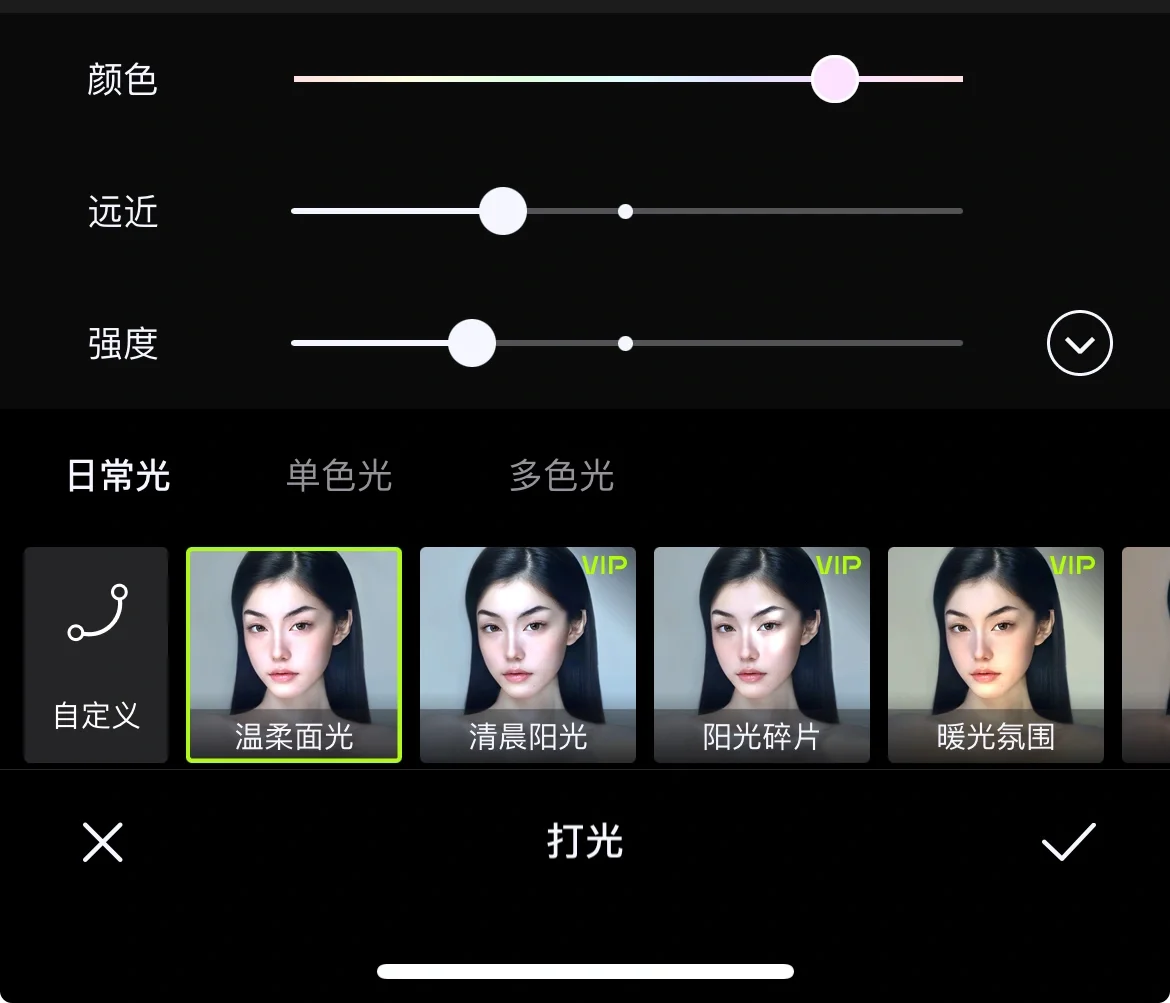
The final step used the portrait lighting feature. Since most shots were taken from a low angle, shadow blockage under branches left heavy shadows around the face and neck, hindering image quality. I selected the "Gentle Face Light" preset under ambient lighting, fine-tuning distance and intensity. Lighting shouldn't be too heavy; just a subtle, even glow around the face brings out facial dimension instantly. This face lighting is ultra-friendly for Cosplay photography—rather than casting harsh artificial light, it simulates natural diffuse reflection, maintaining highlight integrity while giving facial features crisp 3D depth.
Naturally, these parameters aren't rigid rules. Different cameras, base exposures, and light angles will produce varying results with identical settings. The adjustment values shared here reflect my personal preference for this specific scenario. If your test looks too intense or muted, feel free to tweak opacity or contrast based on this framework. Retouching is ultimately a quest for balance rather than a rigid gold standard—capturing the exact atmosphere you envisioned makes it a successful shot.