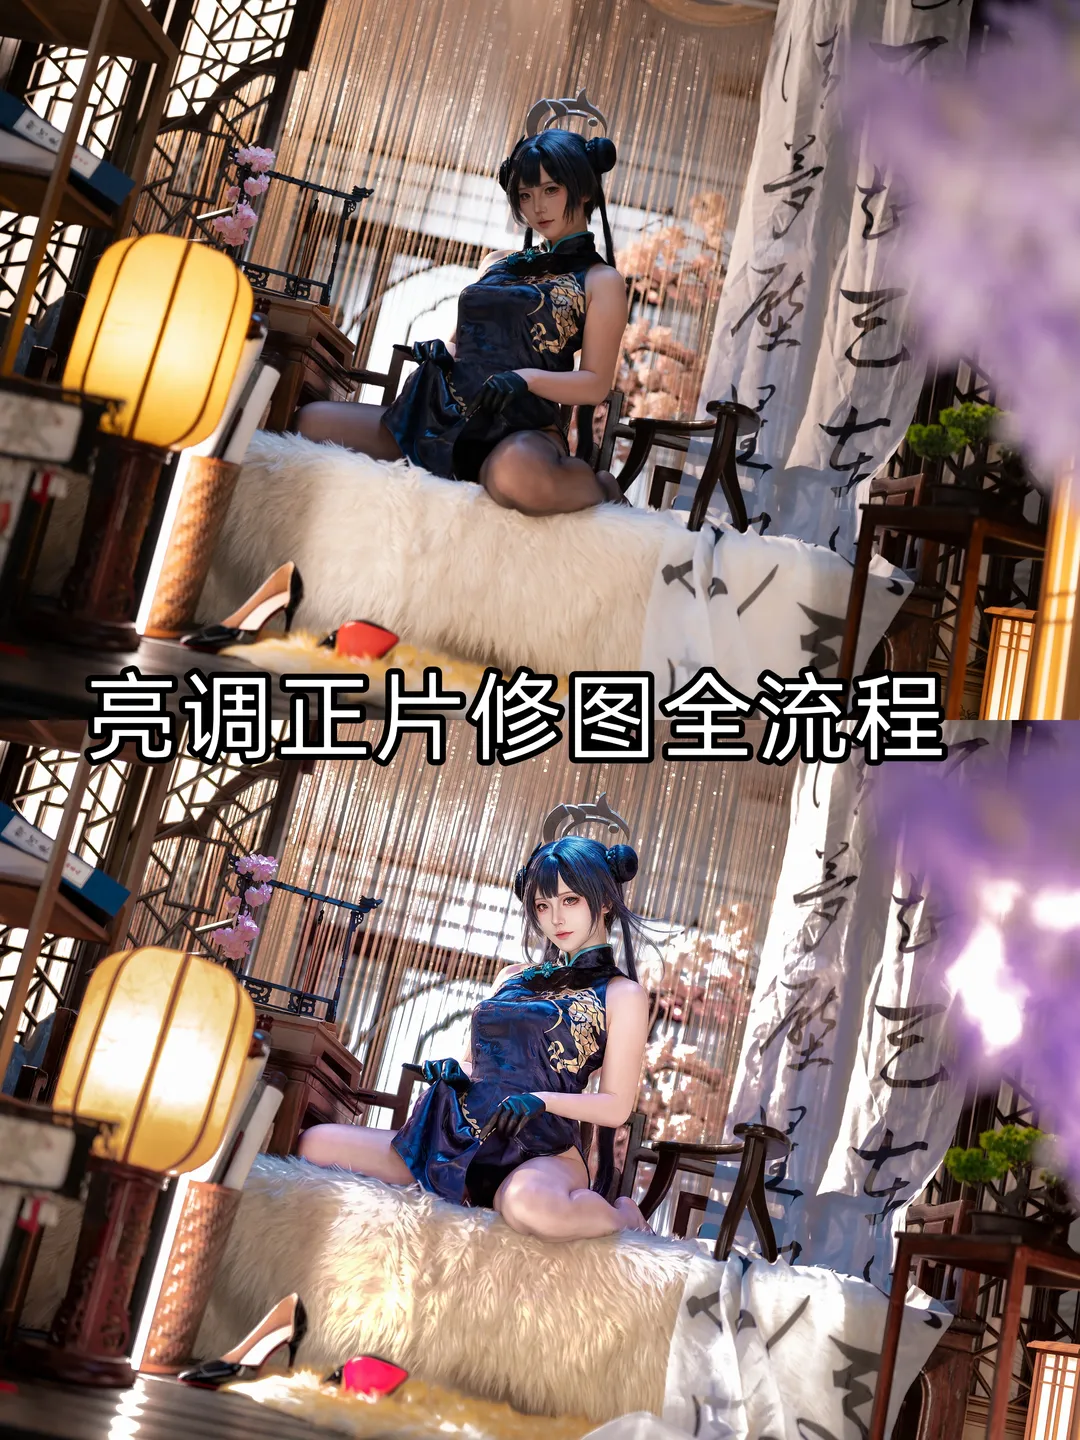
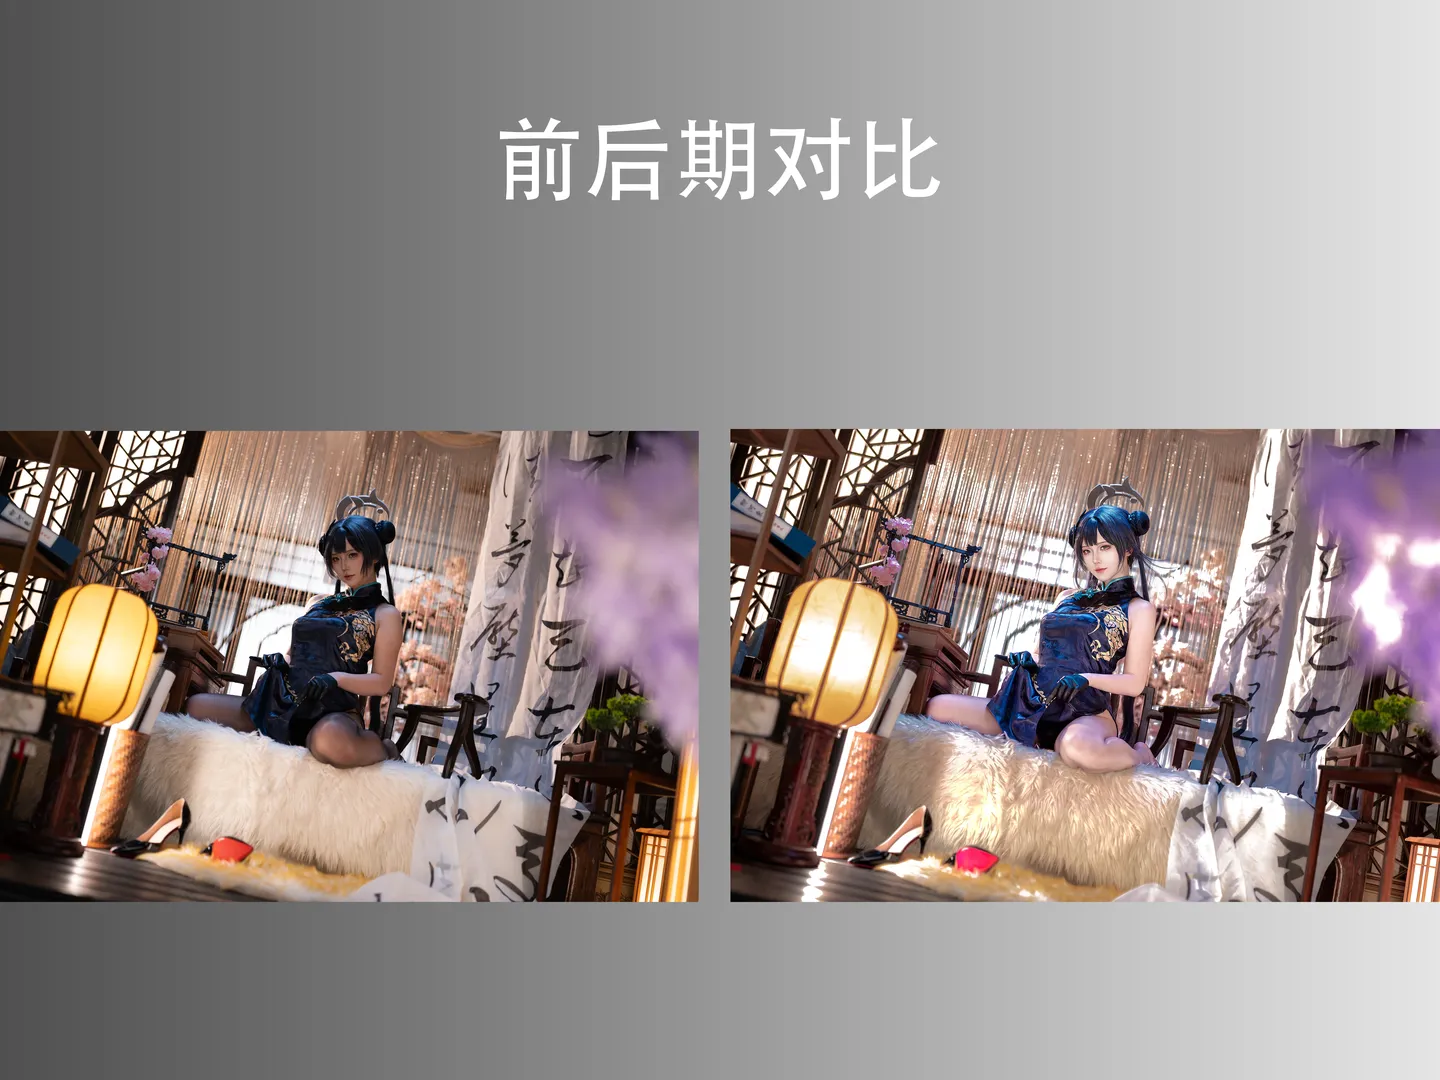
For this set of New Chinese Guofeng Qipao photos, in order to preserve the ambiance of the on-site lanterns and ambient light during shooting, the raw photos inevitably suffered from overexposed highlights and rather dark shadows. To transform the raw images into luminous, textured high-key final photos, I used Pixel cake to execute a complete post-processing workflow for this Photo editing tutorial.
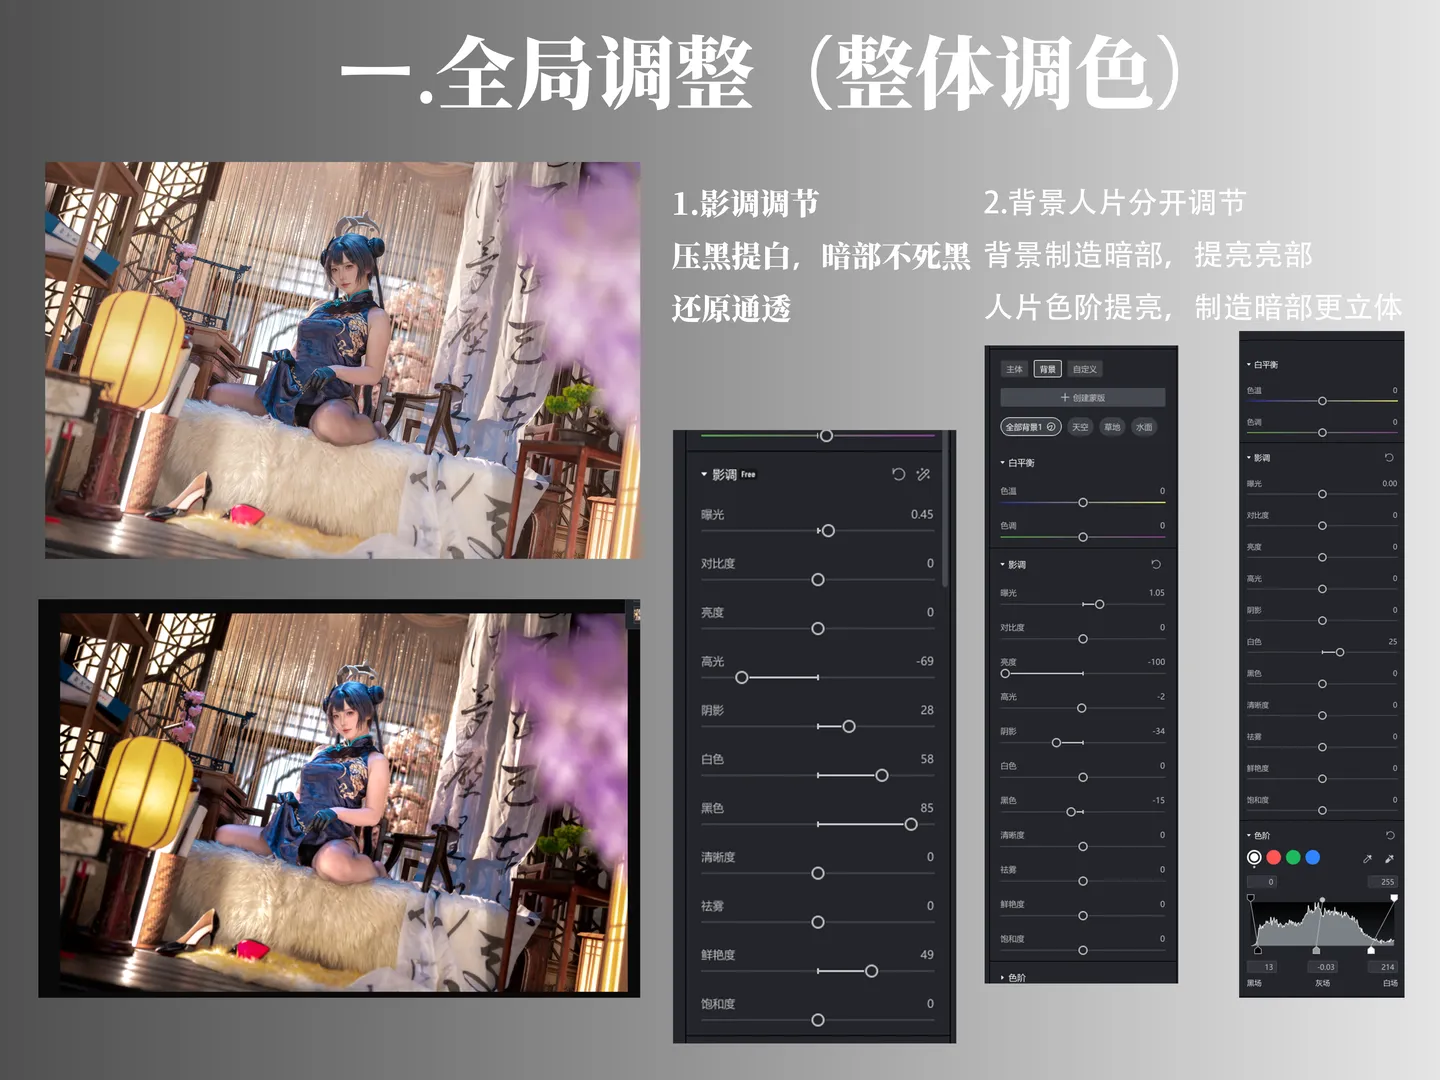
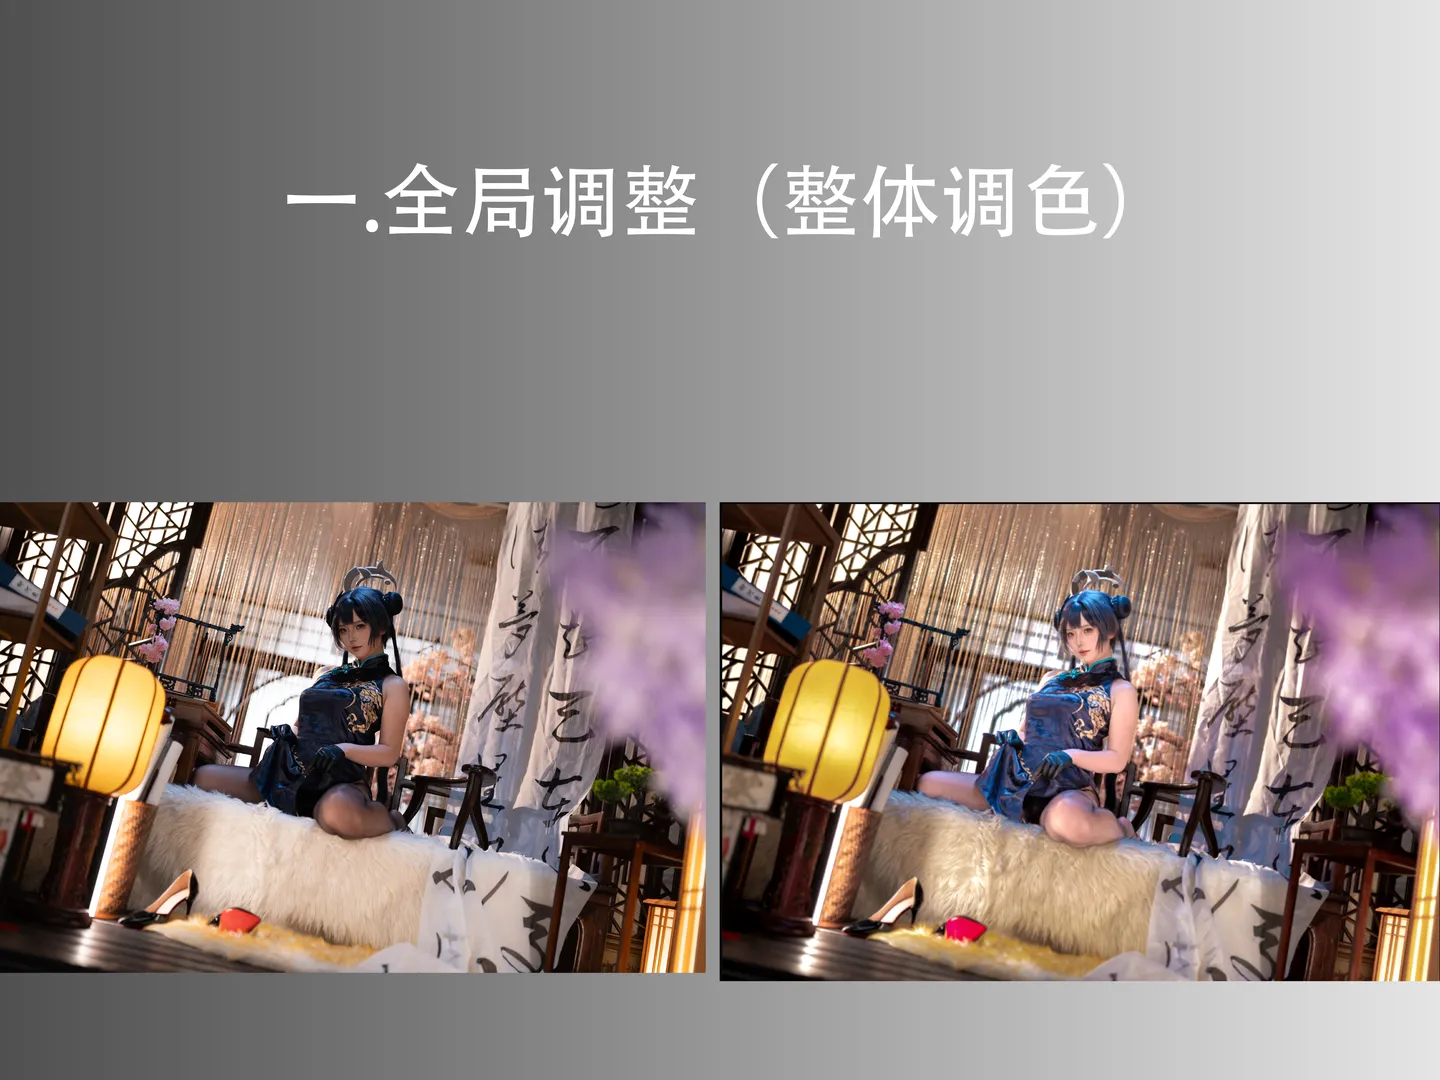
Starting with the overall approach: in the global tonal adjustment step, my core consideration was balancing highlights and shadows rather than simply boosting overall brightness. In the panel, I pushed Exposure to +0.45, but crucially dialed down Highlights to -69 while lifting Shadows to +28. The purpose is to keep background highlights from becoming harsh while rescuing dark scene details. For example, without lowering highlights, the warm yellow lantern light source on the left would become a blown-out blur; pushing Whites to +58 and Blacks to +85 adds dynamic contrast while ensuring an overall bright tone. Additionally, during global adjustments, I separated the background and the subject: darkening the background emphasizes the model, while brightening the subject makes them pop against the darker surroundings, creating a strong three-dimensional depth for Portrait photography.
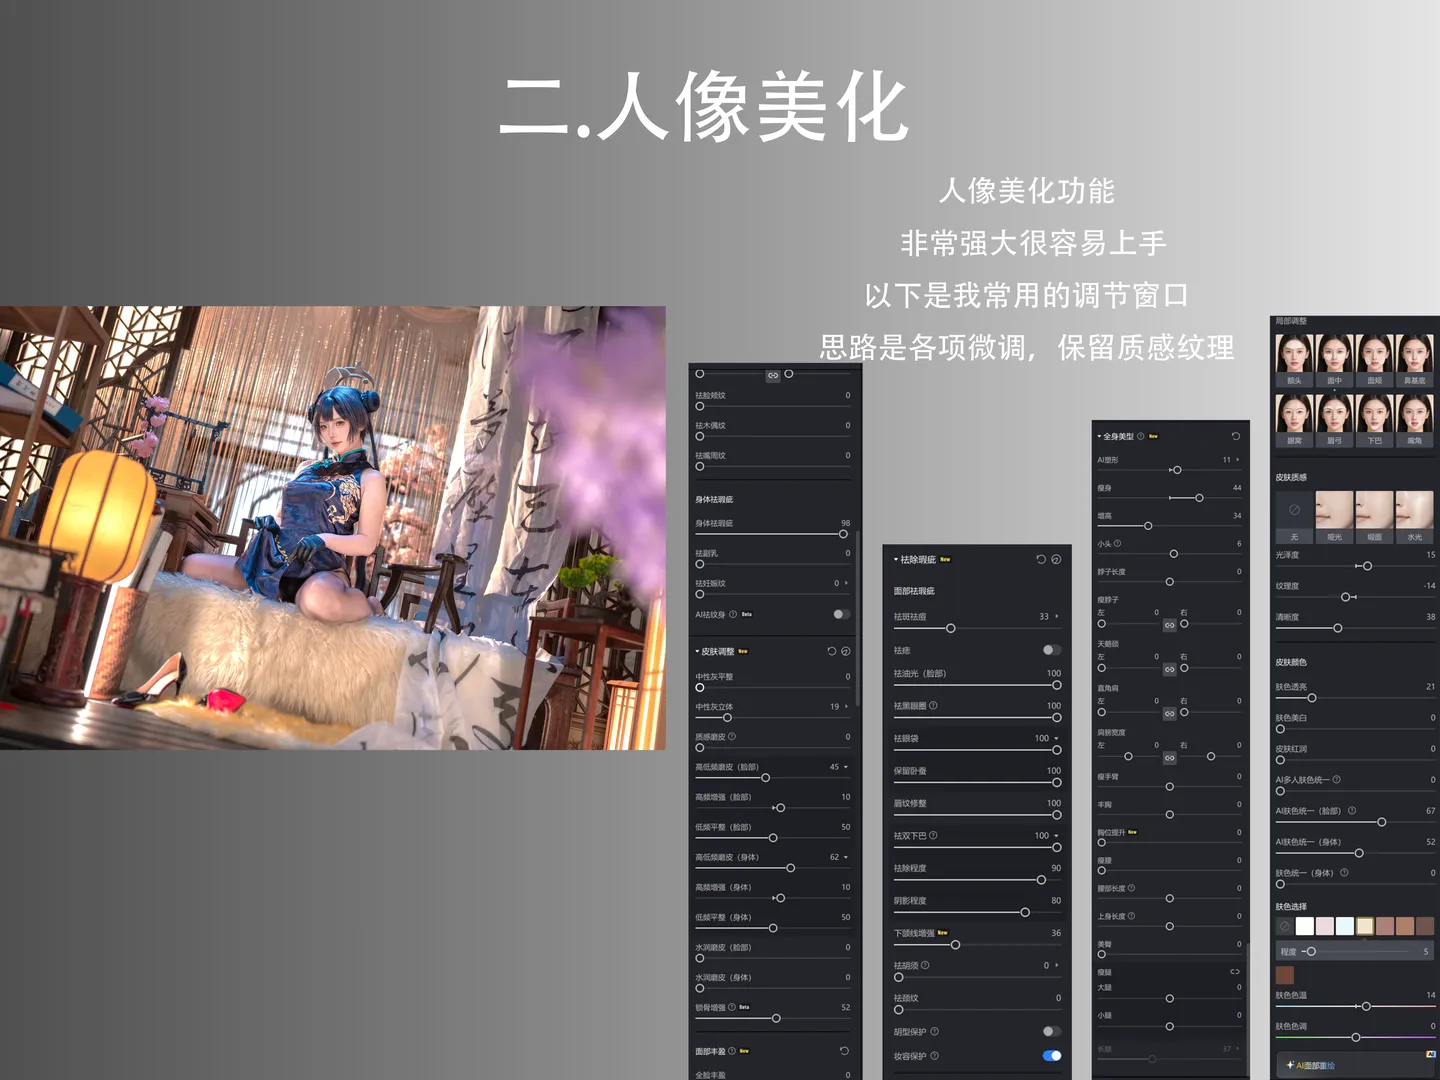
Entering the Portrait photography retouching stage, never max out sliders mindlessly. I slightly increased facial luminosity to eliminate oiliness while using frequency separation to preserve natural skin texture. The skin tone unification feature is immensely helpful for cosplayers, evening out skin tone discrepancies caused by uneven on-set lighting. I usually set skin smoothing around 33 to preserve subtle skin texture so it looks authentic and lifelike. Fine-tuning facial contrast instantly defines facial contours. For the Black stockings and exposed arm skin, I applied targeted brightening and smoothing to ensure unified skin tones across the entire image.
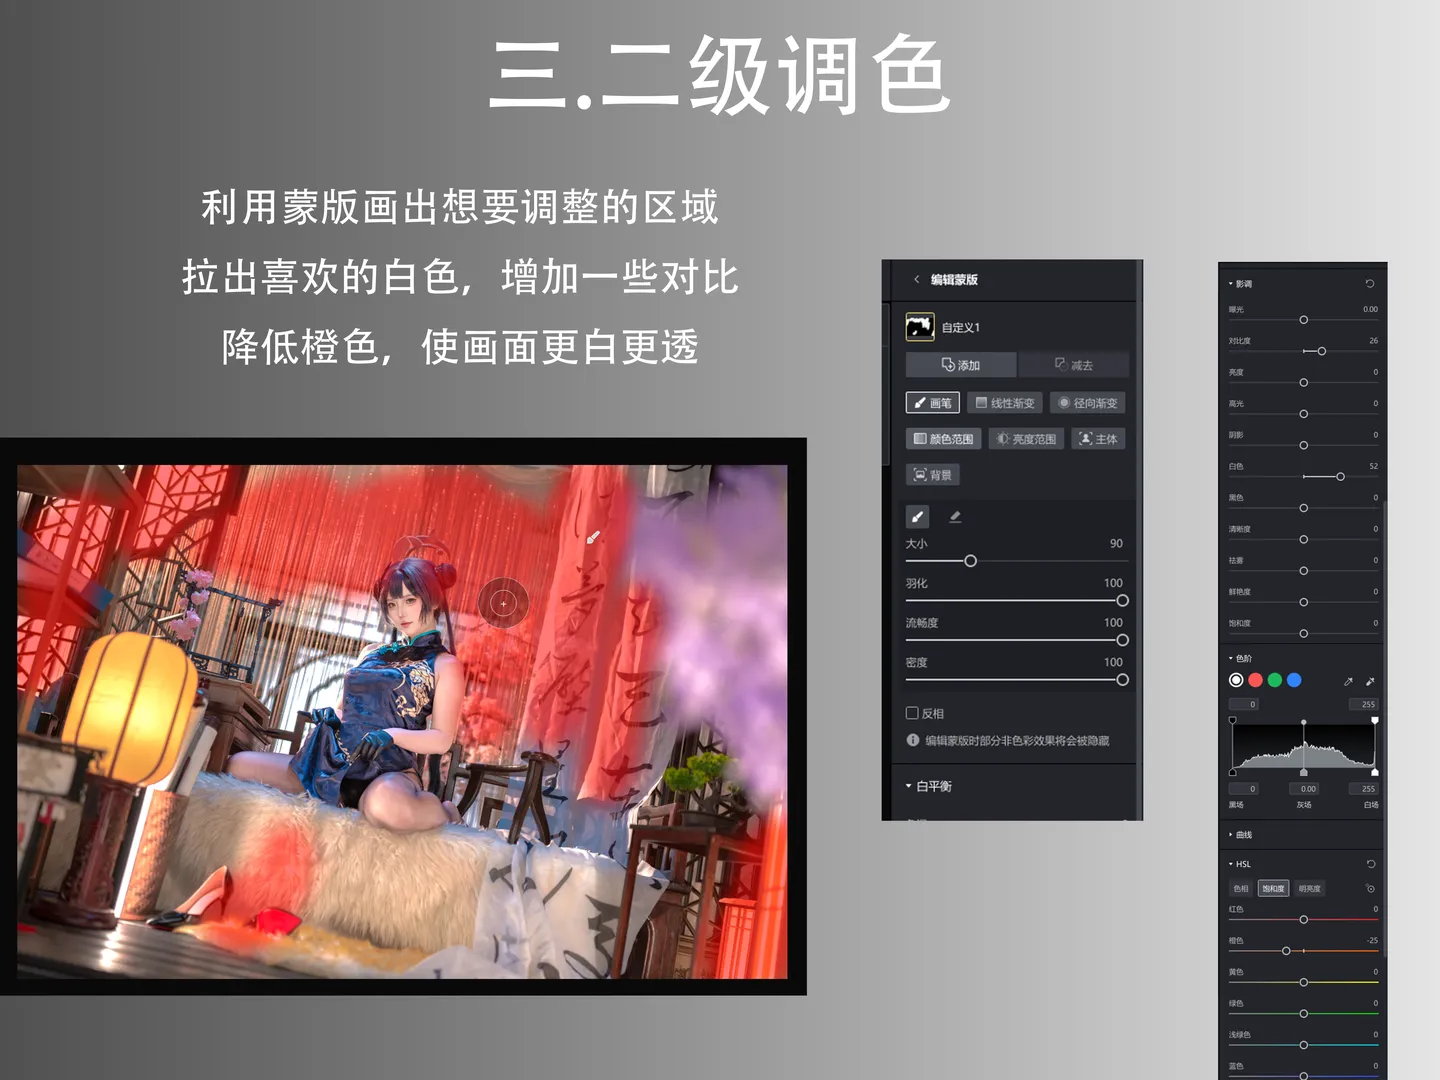
Secondary color grading is the decisive step for elevating image texture. Utilizing masking tools, I defined specific areas with brush and radial gradient masks. For instance, to make the background calligraphy and paintings whiter and cleaner, I boosted whites there while reducing excess orange hues. For the lanterns on the left and the dangling beaded curtains—which were overly warm and yellowish in the raw shot—lowering orange saturation and adjusting hue made them look crisp and clean. Local operations maintain the overall ambient tone while visually crafting a pristine backdrop.
I also invested significant effort into the costume and styling for this shoot. The new Chinese blue-and-black Qipao, paired with custom wig styling, hair ornaments, and Black stockings, delivers a blend of vintage and modern aesthetics. Shooting Black stockings under strong light and subsequently brightening leg highlights in post elongates visual leg proportions. The contrast of light and shadow between thighs and calves makes the silhouette appear more well-proportioned. While retouching, I often reminisced about the classical ambiance permeating the room during the shoot; this post-processing mindset suits this environment and attire wonderfully, which is why I broke down the workflow into this Photo editing tutorial.
If you also want to try creating this high-key finished look for New Chinese Guofeng Qipao cosplay, I recommend paying close attention to unifying skin tones and preserving shadow details. Pixel cake's AI is extremely handy, but manually controlling local highlights remains essential. I hope this workflow helps everyone in their Portrait photography editing!