Let me share a multi-light setup for convention photography that I've been working on recently; it is proven to be very stable in complex environments.
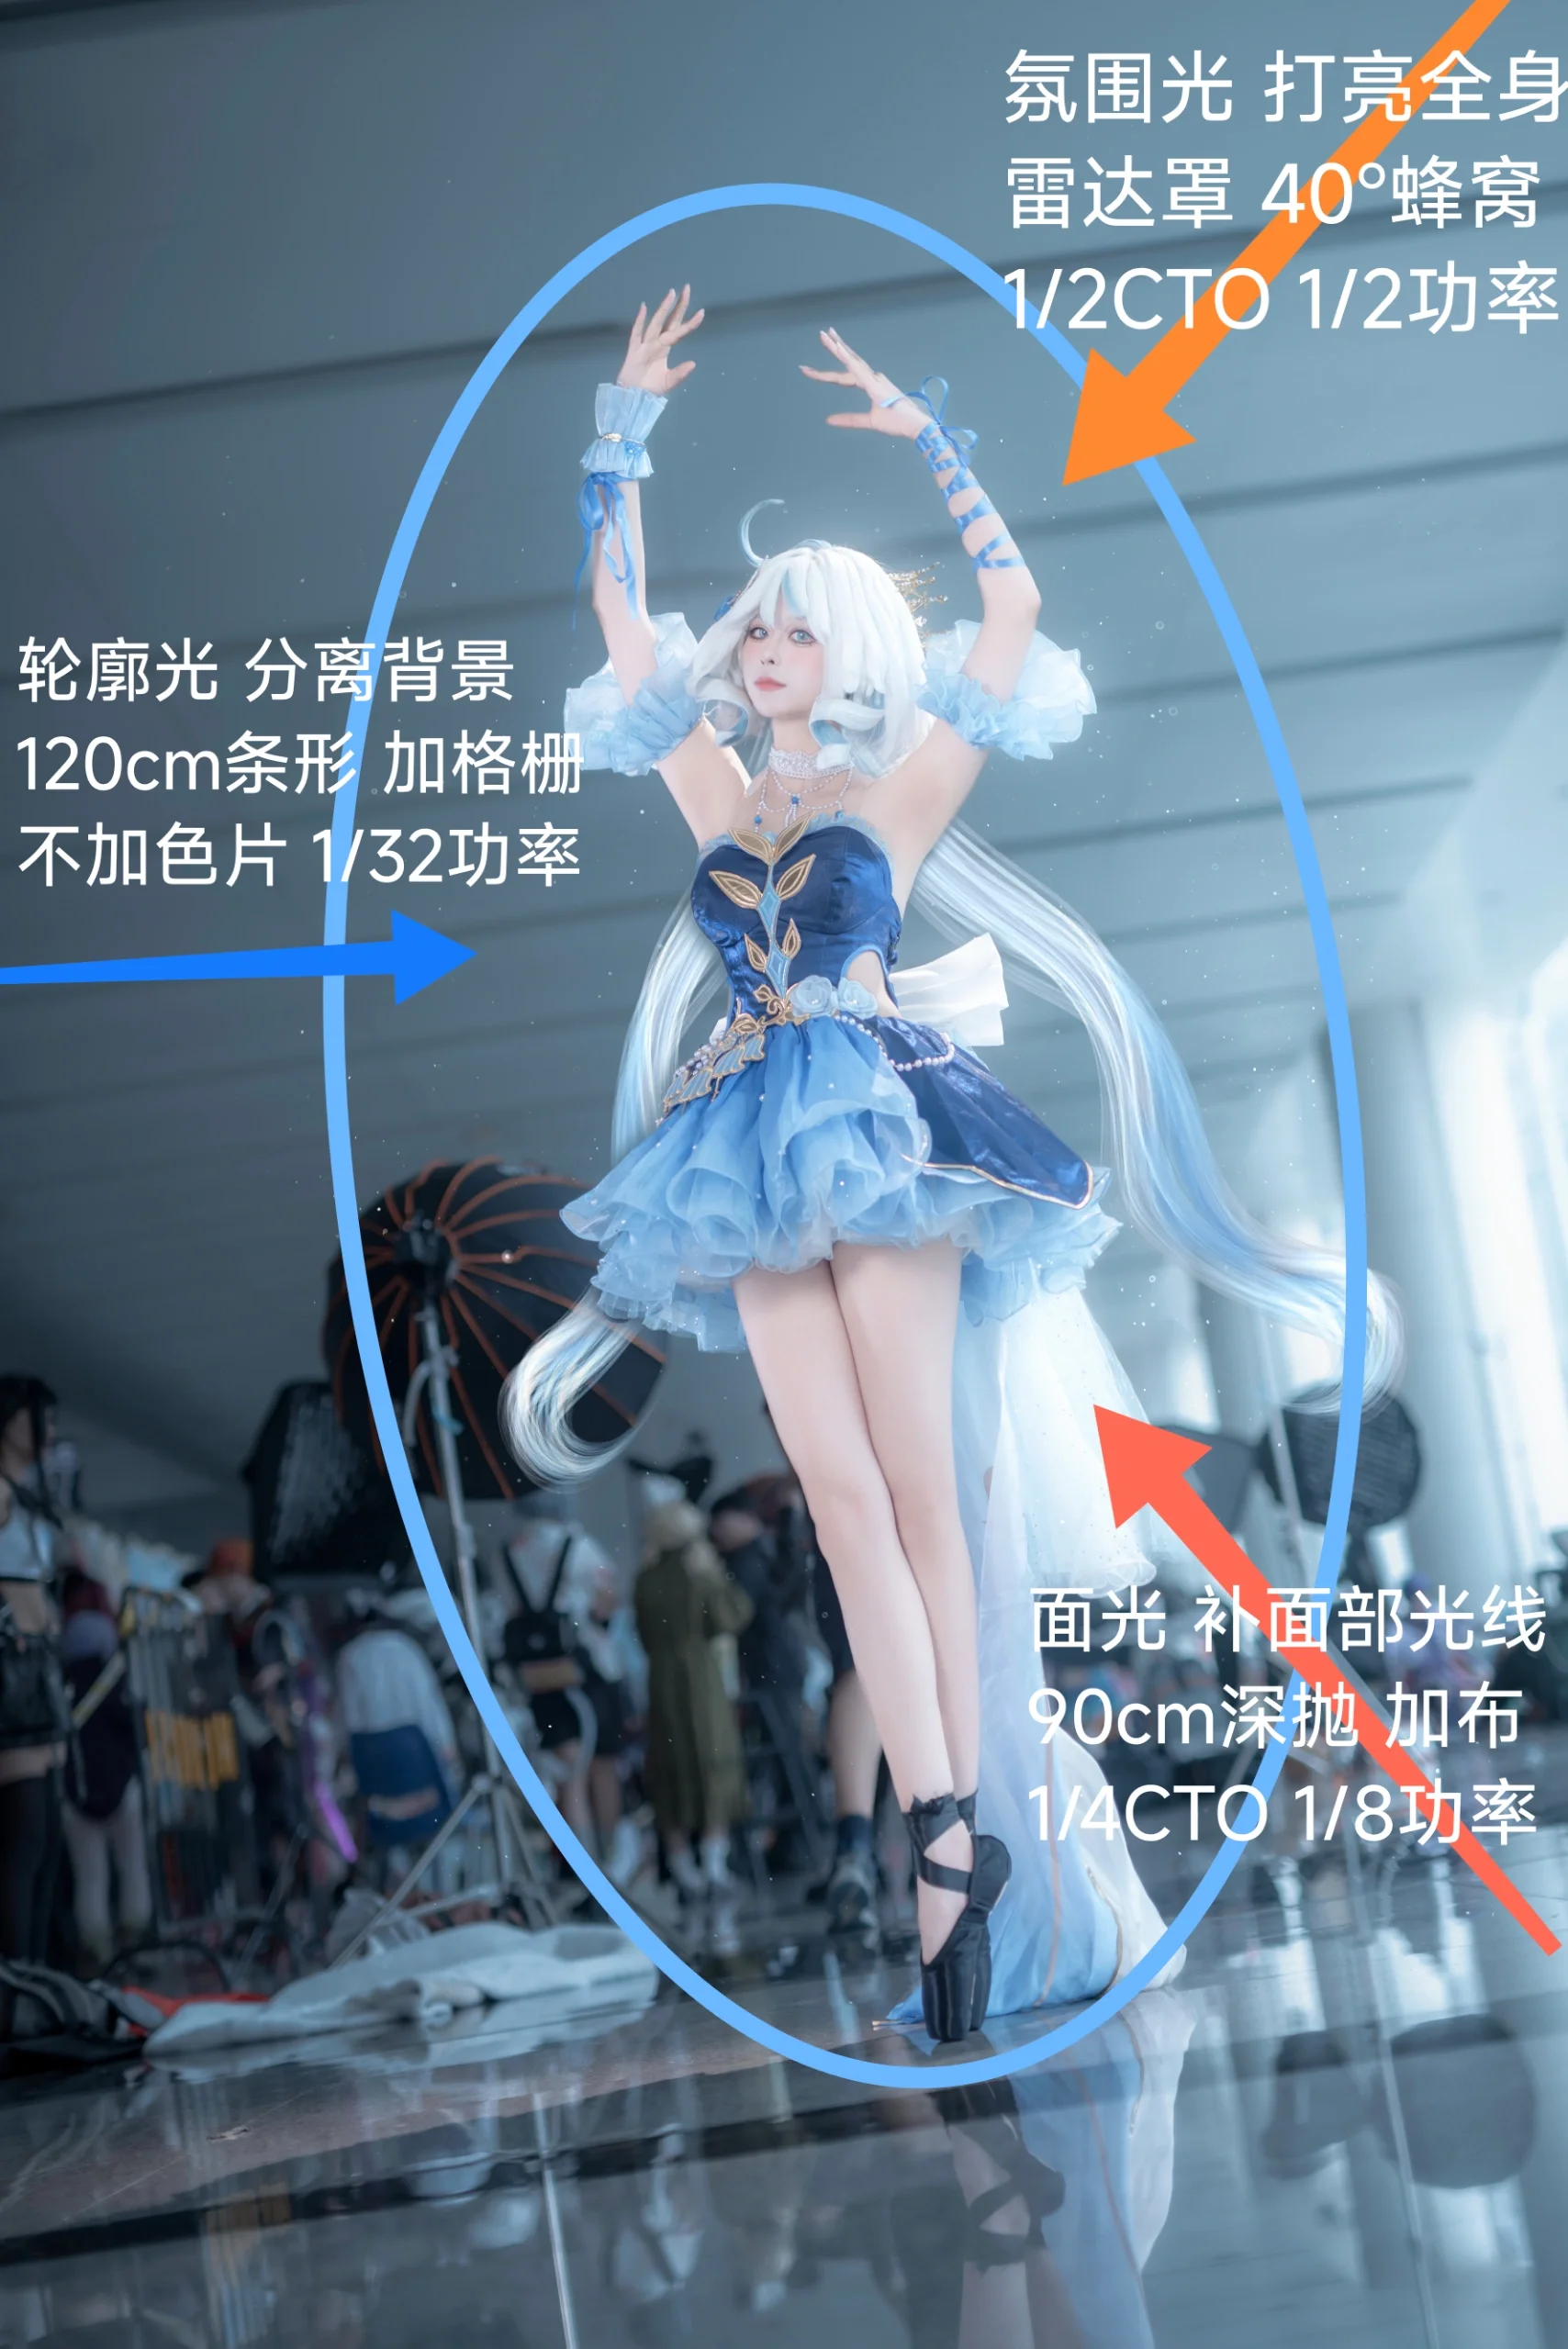
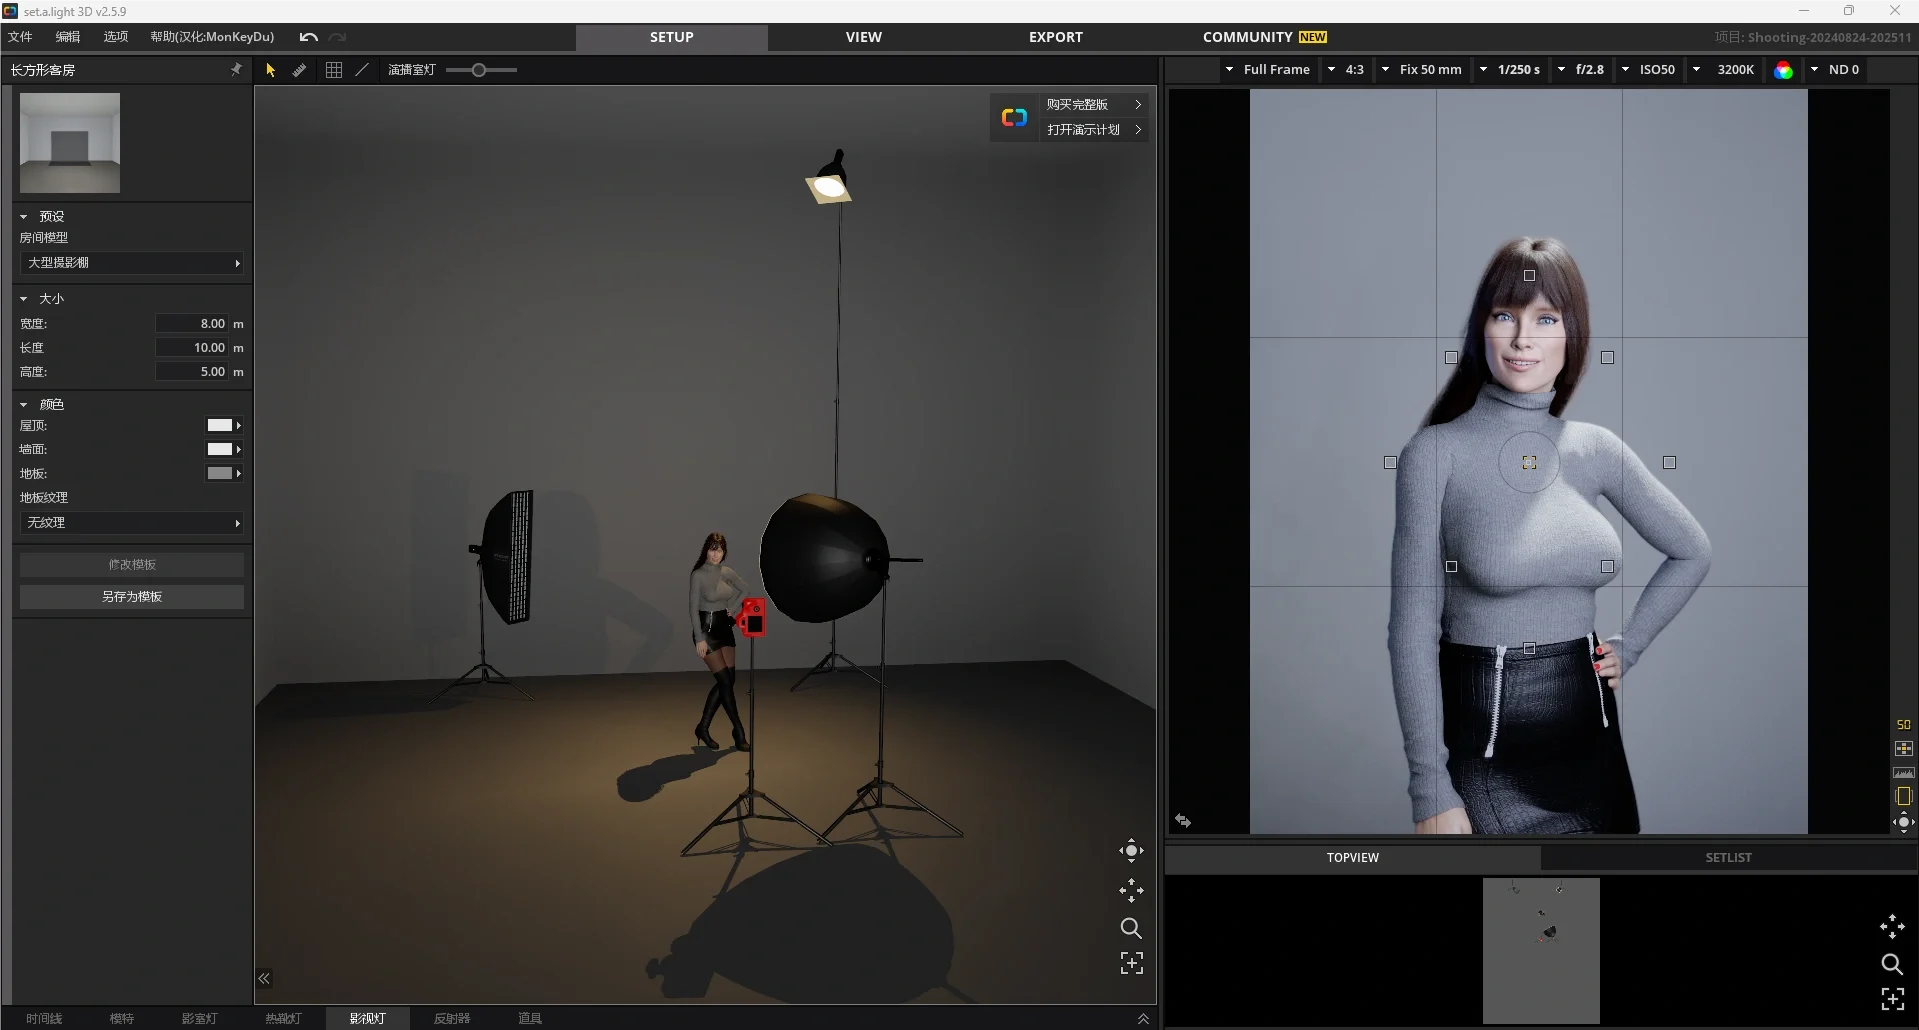
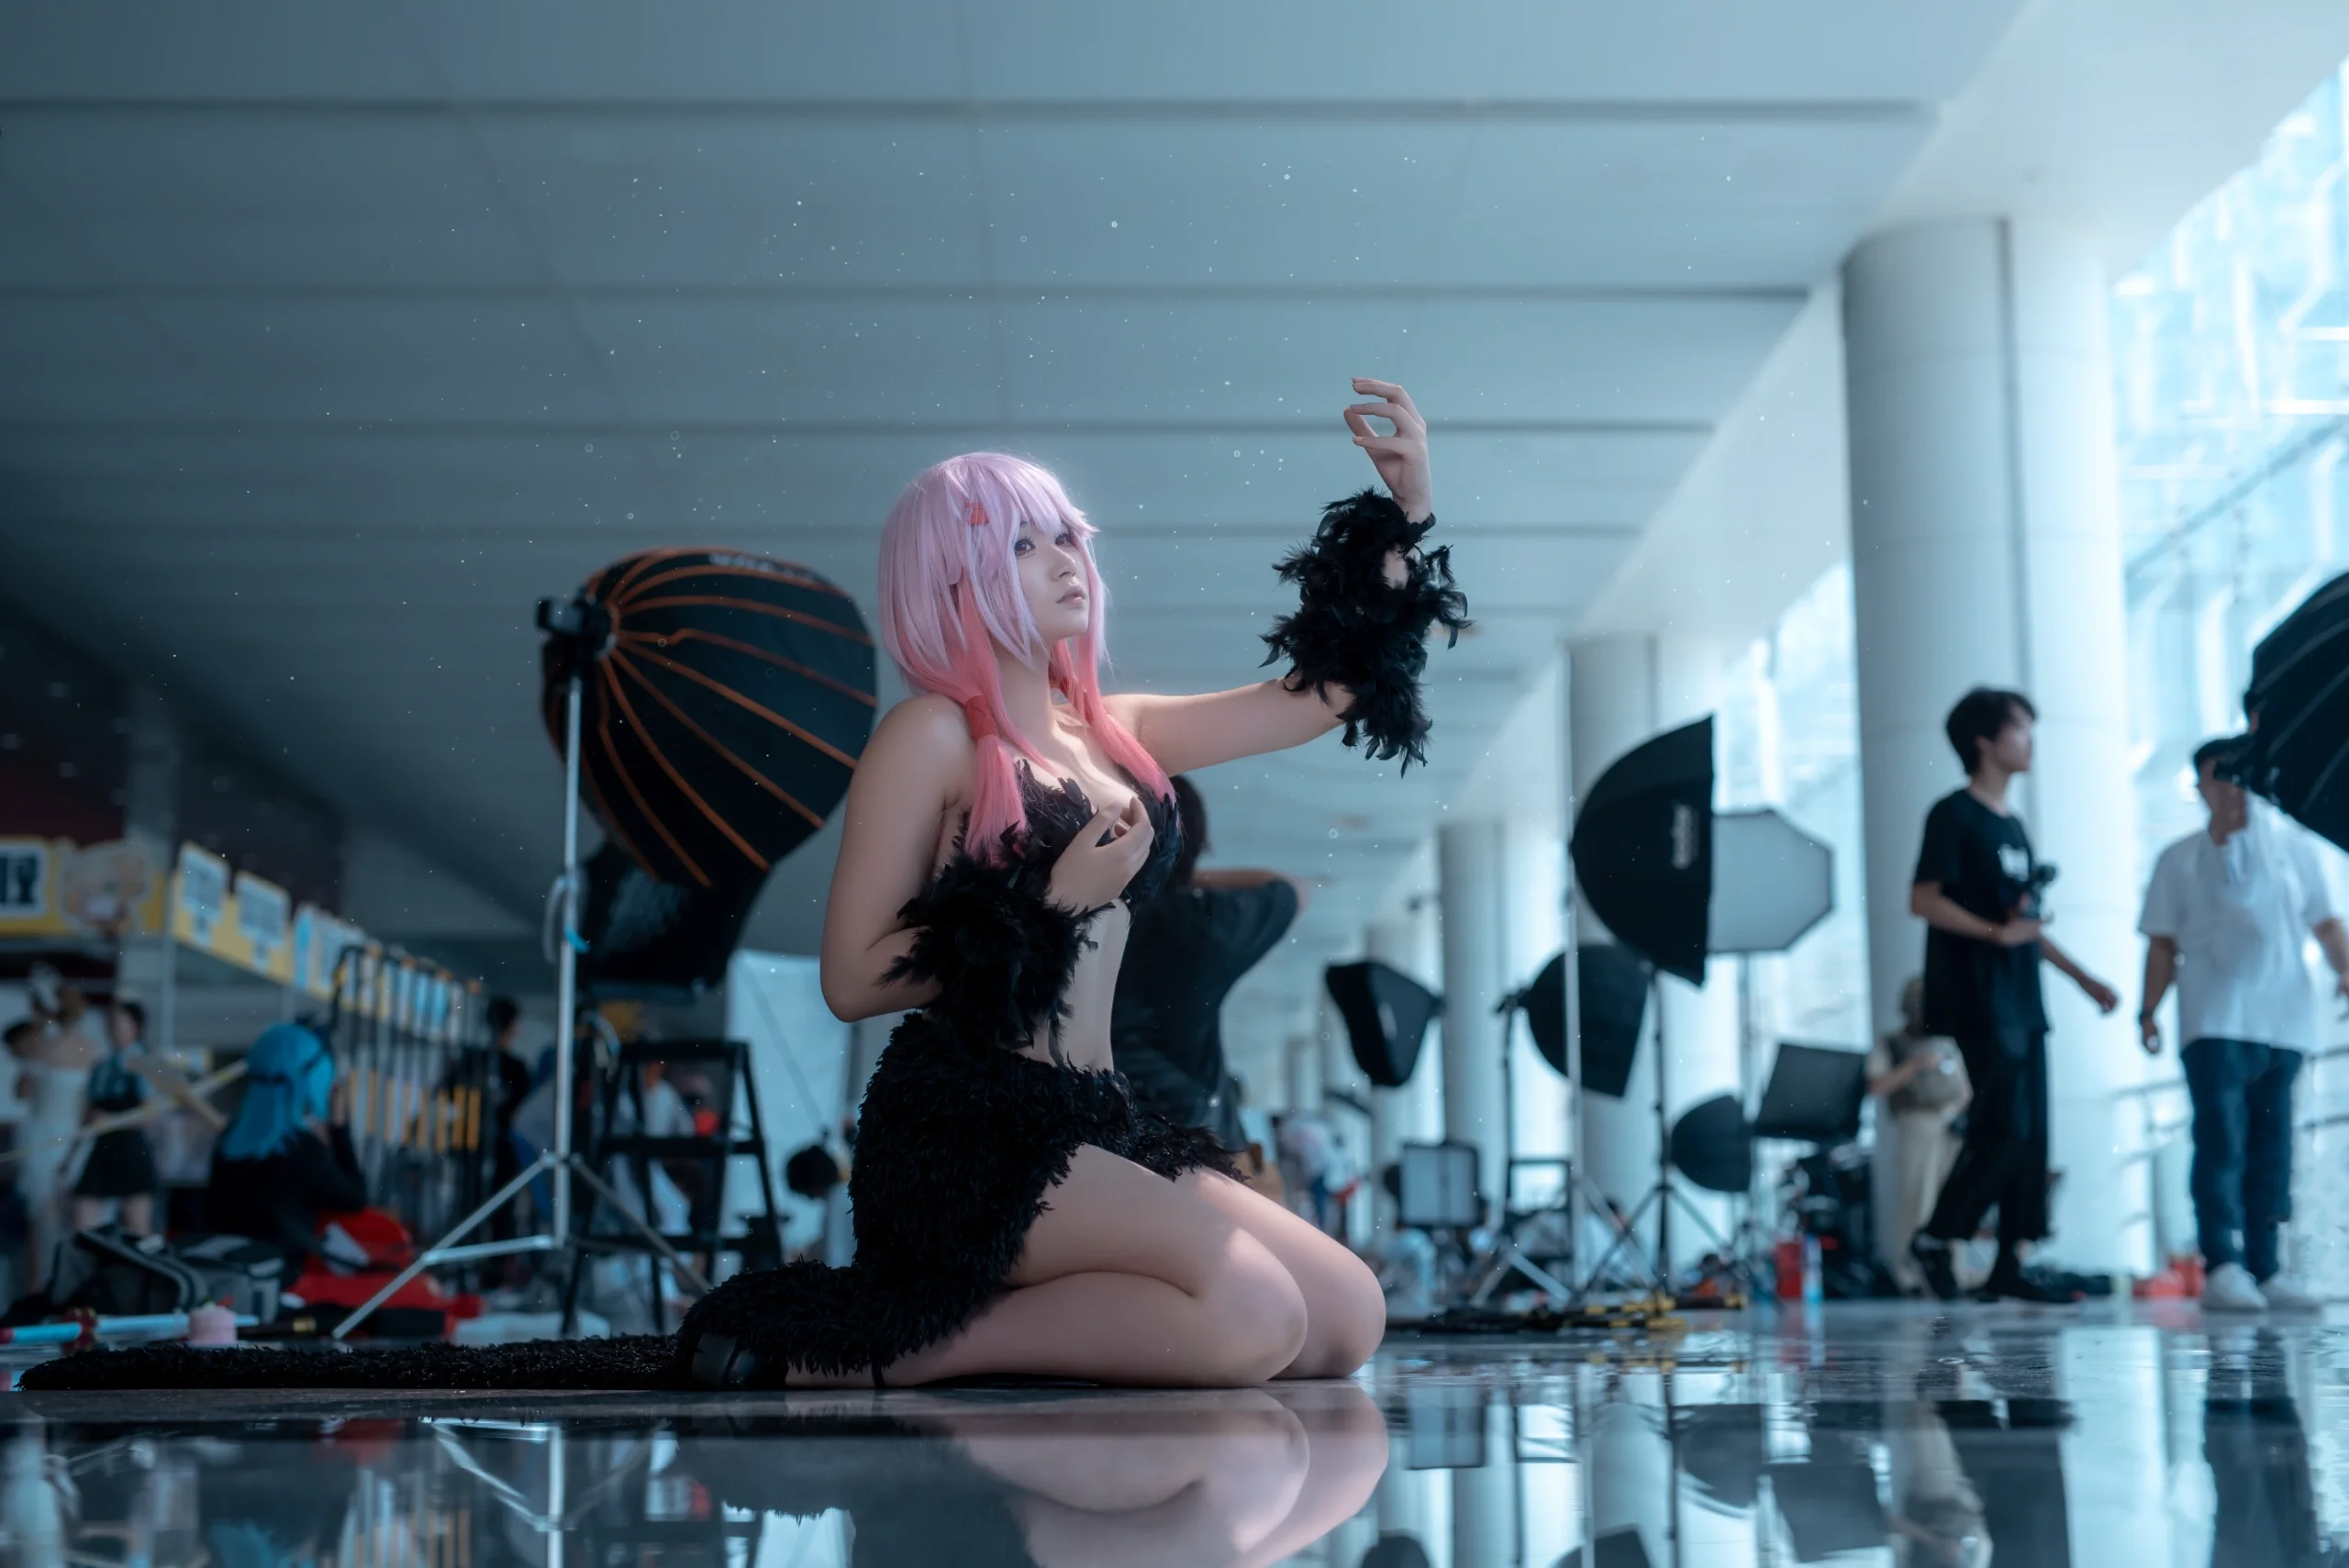
For these convention photos, I still used a three-point lighting setup combined with the Yongnuo flash trigger system. As you can see from the actual effect in Figure 3, it isolates the character beautifully even against a cluttered background. The main idea revolves around high-key tones and highlighting the character's texture. For the overhead light, I specially set up a 4.8-meter high light stand, using a standard reflector plus a honeycomb grid to control the direction of the light, paired with a 1/2 CTO gel to adjust the color temperature. This height is actually highly calculated; it ensures that the light evenly covers the entire body while avoiding the unsightly shadows on the face that traditional frontal fill lights often create. For the facial key light, a 90cm deep parabolic softbox paired with a 1/4 CTO gel was specifically used. The power was set very soft, with the primary purpose of localized brightening and making the skin tone look translucent and natural.
Paired further with a 120cm strip softbox with a grid from the back-side to create a rim light, adjusting the white balance in advance with physical gels is crucial in indoor venues like comic conventions where natural light tends to lean cold. The camera body used was a D750 paired with a Sigma 50mm f1.4 Art lens, with the color temperature manually set to 3200K. This white balance, paired with the CTO gels in front of the flashes, captures a beautiful warm-cool contrast effect—a cold background with a warm subject is highly eye-catching. Combined with a large aperture blur of f/2.8, the flow of people and equipment in the background recede into scattered bokeh circles, making it look much cleaner. At the same time, if there are puddles or reflective materials on the ground, they will present a very translucent visual feedback when combined with the rim light. Dust particles and fine glitters floating in the air will also be illuminated by the light, lending a built-in atmosphere to the final photos.
Actually, this setup is not rigid; in actual operation, the light distance and angles still need minor adjustments based on the Cosplayer's positioning and the venue's lighting conditions. For example, tilting the overhead light forward slightly can bring out more beautiful hair highlights, provided it doesn't shine directly on the tip of the nose, which would make the light look abrupt. The bottom light or key light can be appropriately lowered in height; filling in light slightly from the bottom up can soften facial shadows. The use of a high light stand truly relieves the operator's burden; once fixed, there is no need to frequently move equipment, allowing you to focus more energy on guiding the Cosplayer's poses and expressions. It took me some time to figure out this universal method by myself, primarily pursuing an output effect that isn't jarring and blends naturally with the environment. The parameter settings are meant to adapt to most indoor convention venues as much as possible; by controlling the light ratio well in the early stage, the post-processing won't be too difficult to handle. Everyone should try and err more often in daily practice to find the characteristics and reflection points of each accessory. This template can definitely be of great help for portrait photography and cosplay photography.