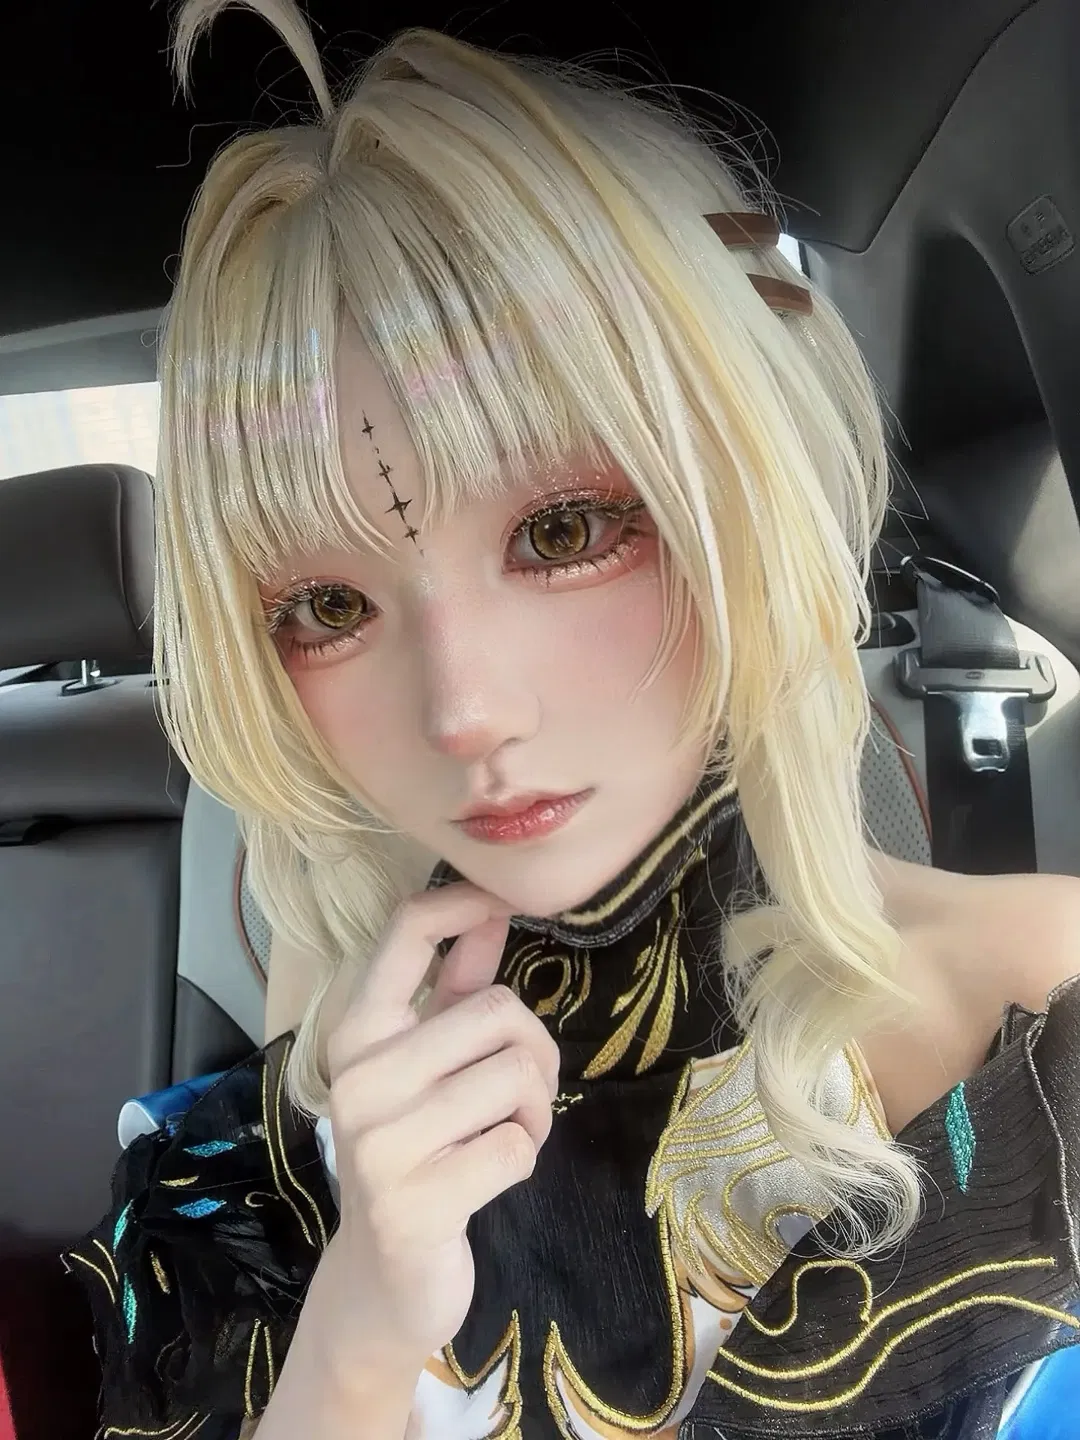
The absolute highlight of this Anime-style makeup is the colored eyelash makeup, which is practically impossible to pull off in conventional 3D life. In daily makeup, people mostly rely on brown or black lashes to enlarge their eyes, but to faithfully evoke 2D visual aesthetics, I specifically used colored lashes infused with delicate glitter. When applying them, you need to cut the false lashes into individual clusters and layer them one by one along the curve of your natural lashes from outer to inner corners, while highlighting the aegyosal (under-eye area) and inner corners with shimmer, instantly elevating the eyes' three-dimensional depth. For the base makeup, I deliberately preserved a soft flush across the face, dusting an expansive wash of pink blush across the nose tip and cheeks, paired with matching lip gloss to soften facial bone structure and cultivate a gentle, youthful vibe. The cross insignia on the forehead was traced using an ultra-fine makeup brush dipped in black gel eyeliner; to prevent smudging, it required a gentle set with translucent loose powder after drawing.
Managing the Blonde wig likewise demanded considerable effort. To recreate that voluminous yet subtly tousled look, I first crimped and lifted the roots with a flat iron, then styled the curved ends with a curling wand; the ahoge strand on top was shaped deliberately using hair wax and setting spray. Brown hairpins on both sides secured stray hairs; when taking a Car selfie, the sunlight filtered through the window directly onto the hair fibers, catching faint iridescence and shimmering glitter. As for the costume, I prepared a black high-collar top featuring heavy gold embroidery on the chest, bordered with cyan-blue textured accents. Because the neckline is quite high, I added a white inner lining, which not only enhanced layering but also felt much more comfortable to wear.
The photo backdrop was the car interior; I initially just intended to take a few casual snaps in the car for documentation, never expecting the window's natural light combined with the dark car seats to elevate the moody atmosphere so remarkably. Resting my chin gently on my left hand, I adopted a cooler expression to align with the styling. But who could have guessed: just an hour after posting the photos, I suddenly realized I had forgotten to set audience filters on Moments! Realizing that real-world relatives and friends seeing these colored eyelashes and forehead mark would probably think I had lost my mind, I instinctively deleted the post in a split second. While this social-death moment was mortifying, it stands as an amusing little anecdote in everyday cosplay life.
To keep the makeup clean and pristine, I used the baking technique for setting, pressing powder firmly into the T-zone and concealed areas; thus, even after being cooped up in the car wearing a Blonde wig for over an hour, the base makeup remained flawless. The hairline of the wig was constructed with lace fronting, blending seamlessly into the forehead with just a slight angle adjustment. Many friends have asked how to prevent static electricity caused by friction between high collars and wigs; in fact, lightly spritzing anti-static spray on the inside of the collar effectively prevents flyaways. Whenever tackling a look with this many details, getting through makeup, wig, and garments takes hours, but seeing the lighting and colors hit just right in the final photos makes every tedious step worthwhile. That wraps up this makeup log—hope it provides useful styling inspiration for your Wuthering Waves cosplay journey!