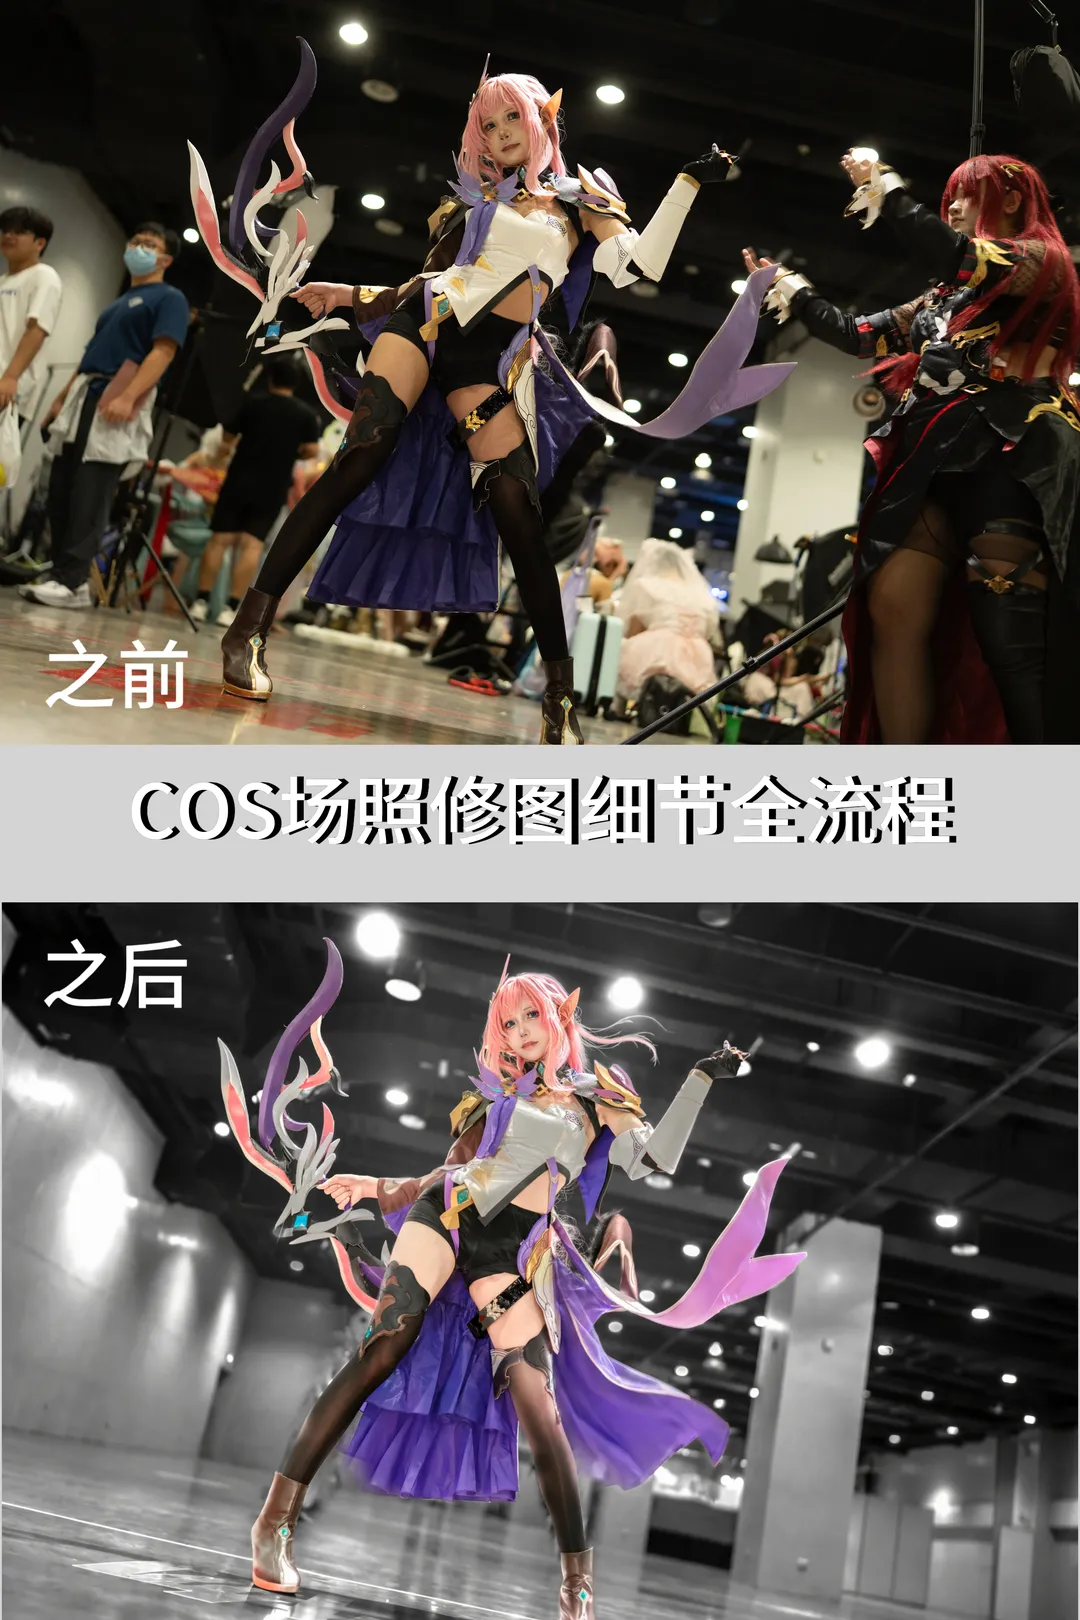
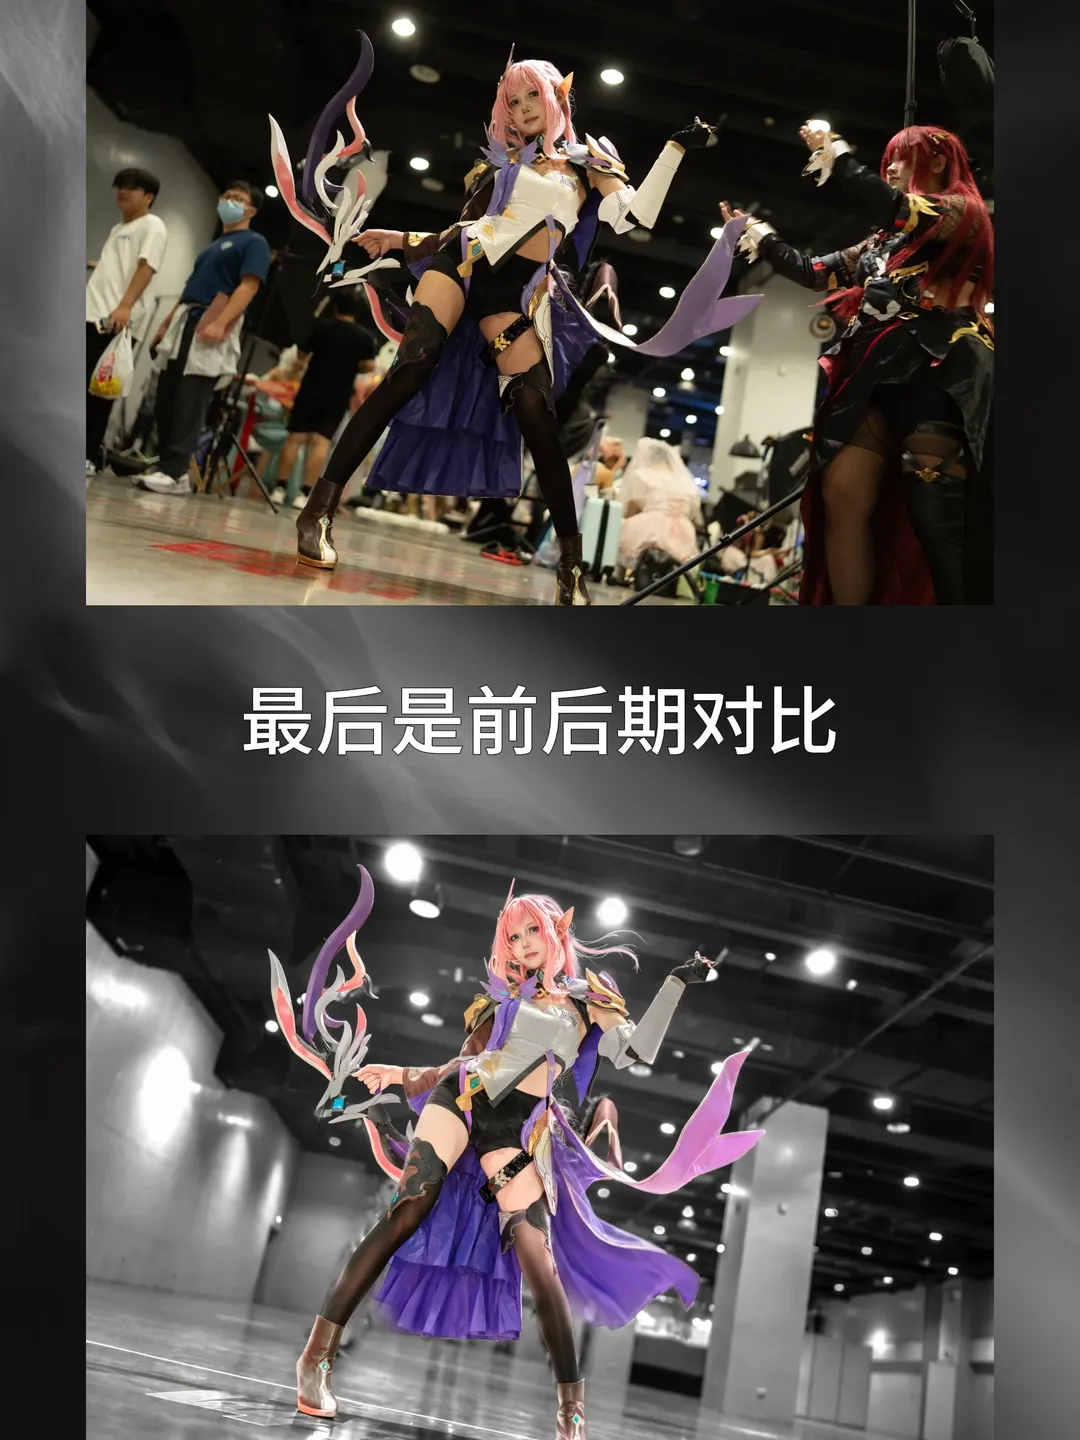
I've fully organized the post-processing workflow for the recent Cosplay event photos at hand. Due to environmental constraints, convention photography often involves many uncontrollable factors—such as chaotic lighting and dense background crowds—making post-processing essential to salvage the shot. This time I used PixCake; its AI features are remarkably convenient, but pairing them with manual adjustments is still necessary for optimal results.
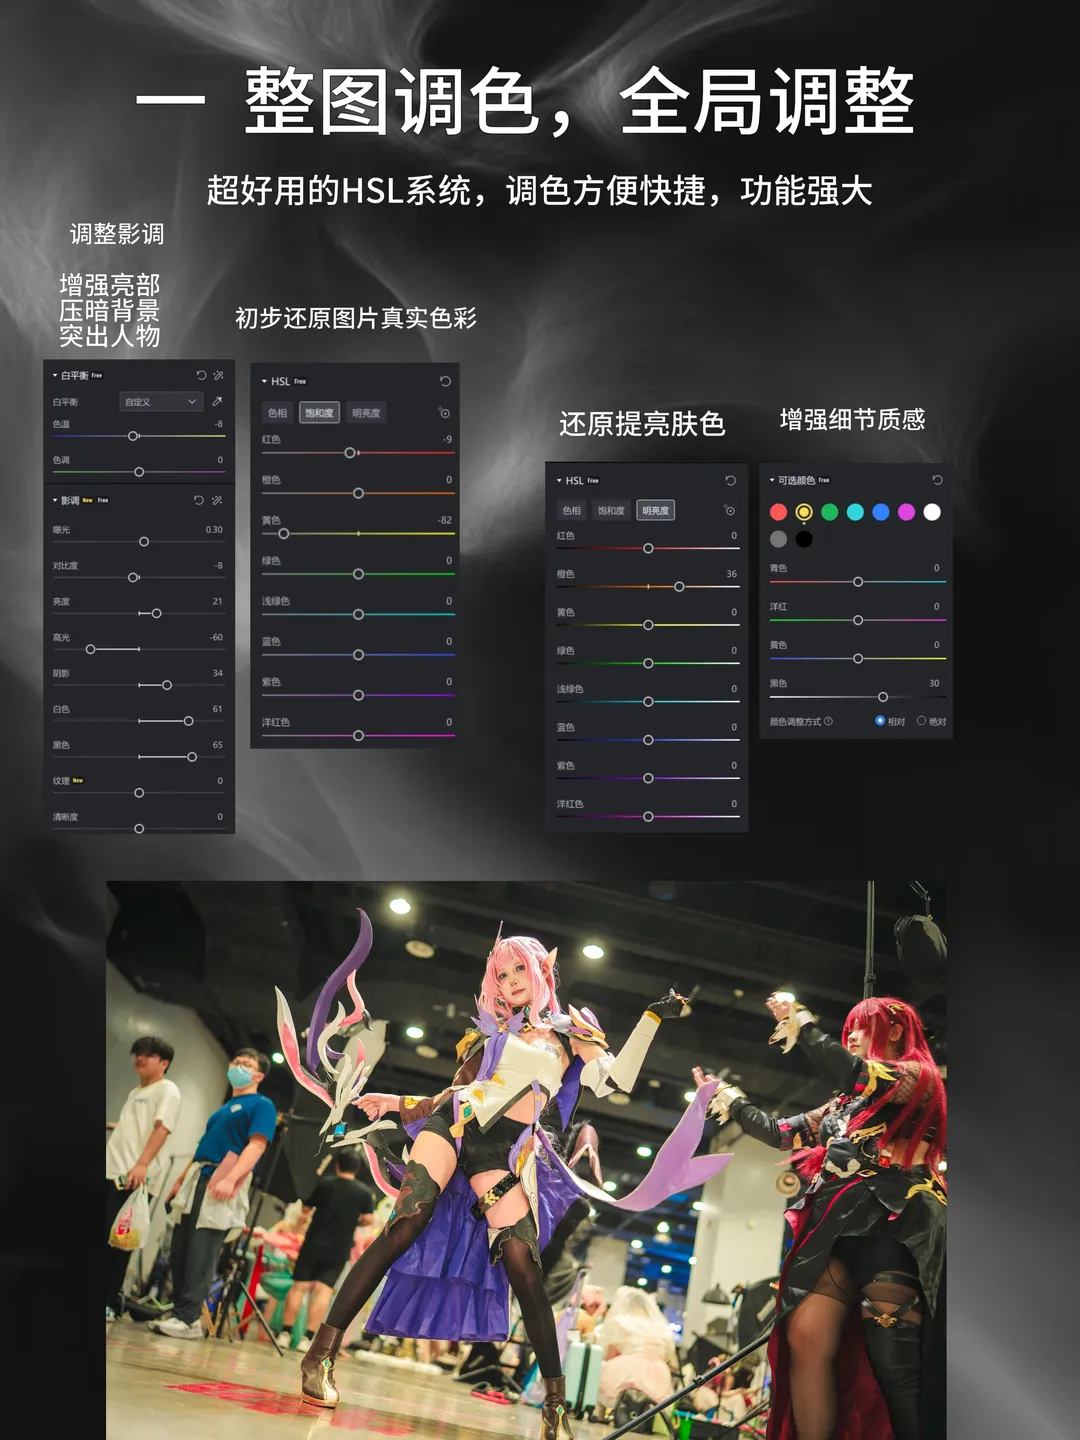
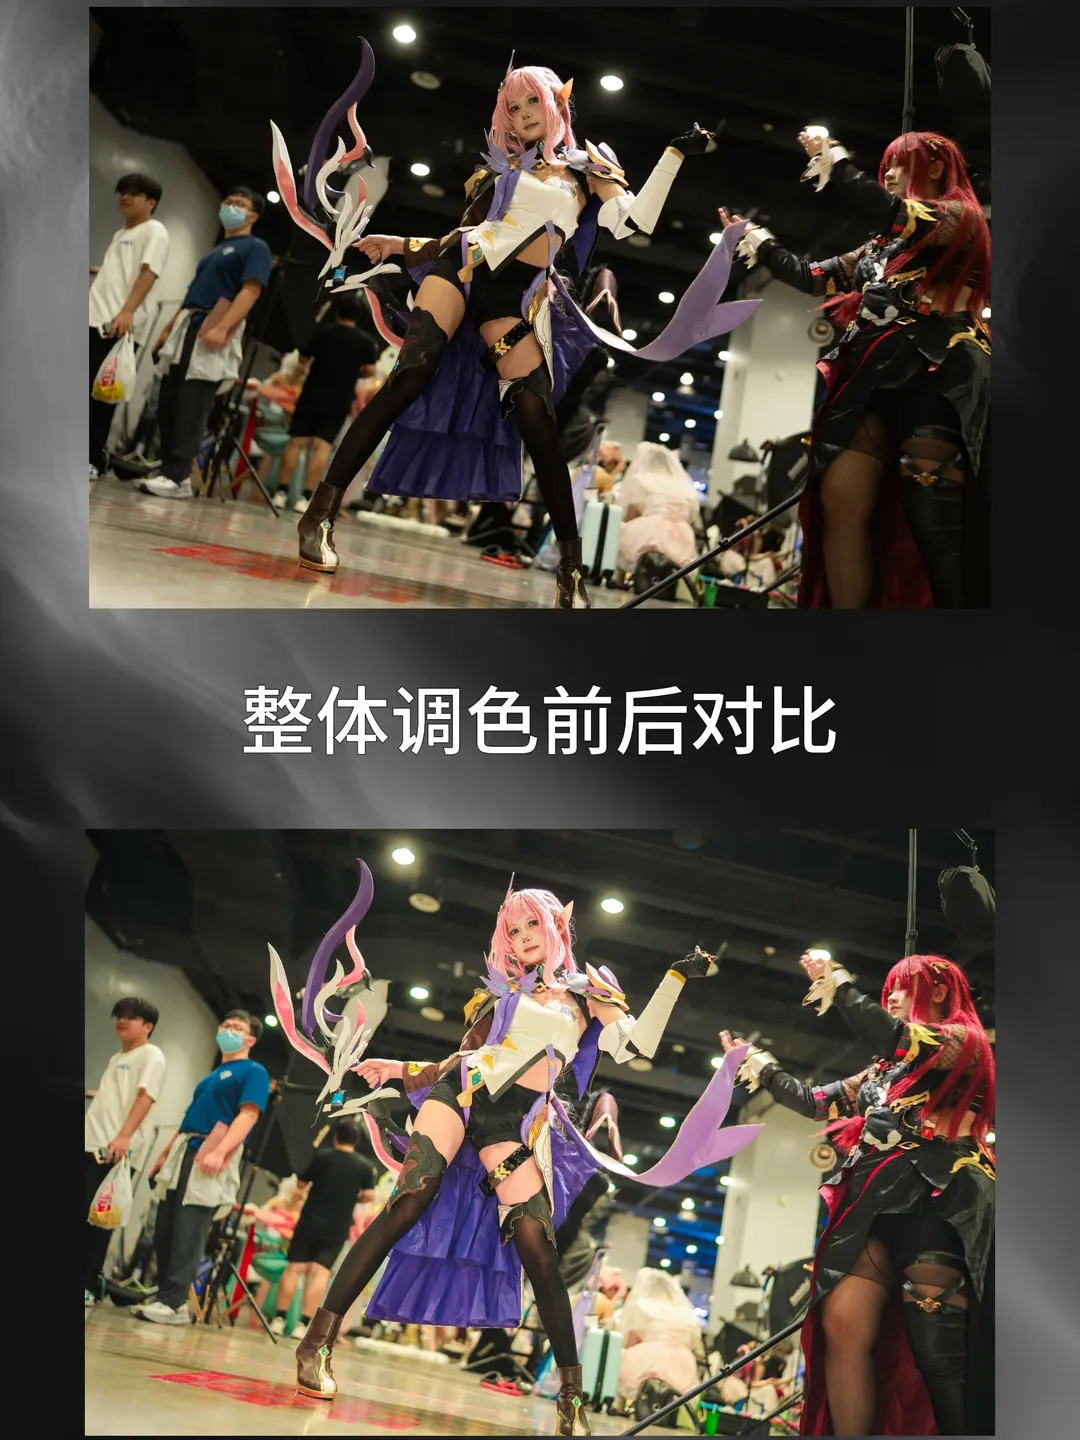
Step 1: Global color grading. I first balance exposure by bringing down harsh highlights so the background doesn't steal focus from the subject, while lifting shadows to retain dark details. Next, using the HSL panel, I adjust orange tones, as orange directly influences skin clarity and luminosity. Brightening skin tones and subduing background luminance lets the character naturally pop out from the environment. By the way, if wearing stockings, adjusting leg tonality during this step is crucial to give the Black stockings a smooth, glossy sheen.
Before Step 1, I usually observe the raw image's light direction, as expo lighting tends to be harsh overhead light or mixed spill light, which requires careful handling. During local adjustments, I like using the brush tool to refine the light reflection along the leg stockings, giving over-the-knee Black stockings a finer, more delicate texture.
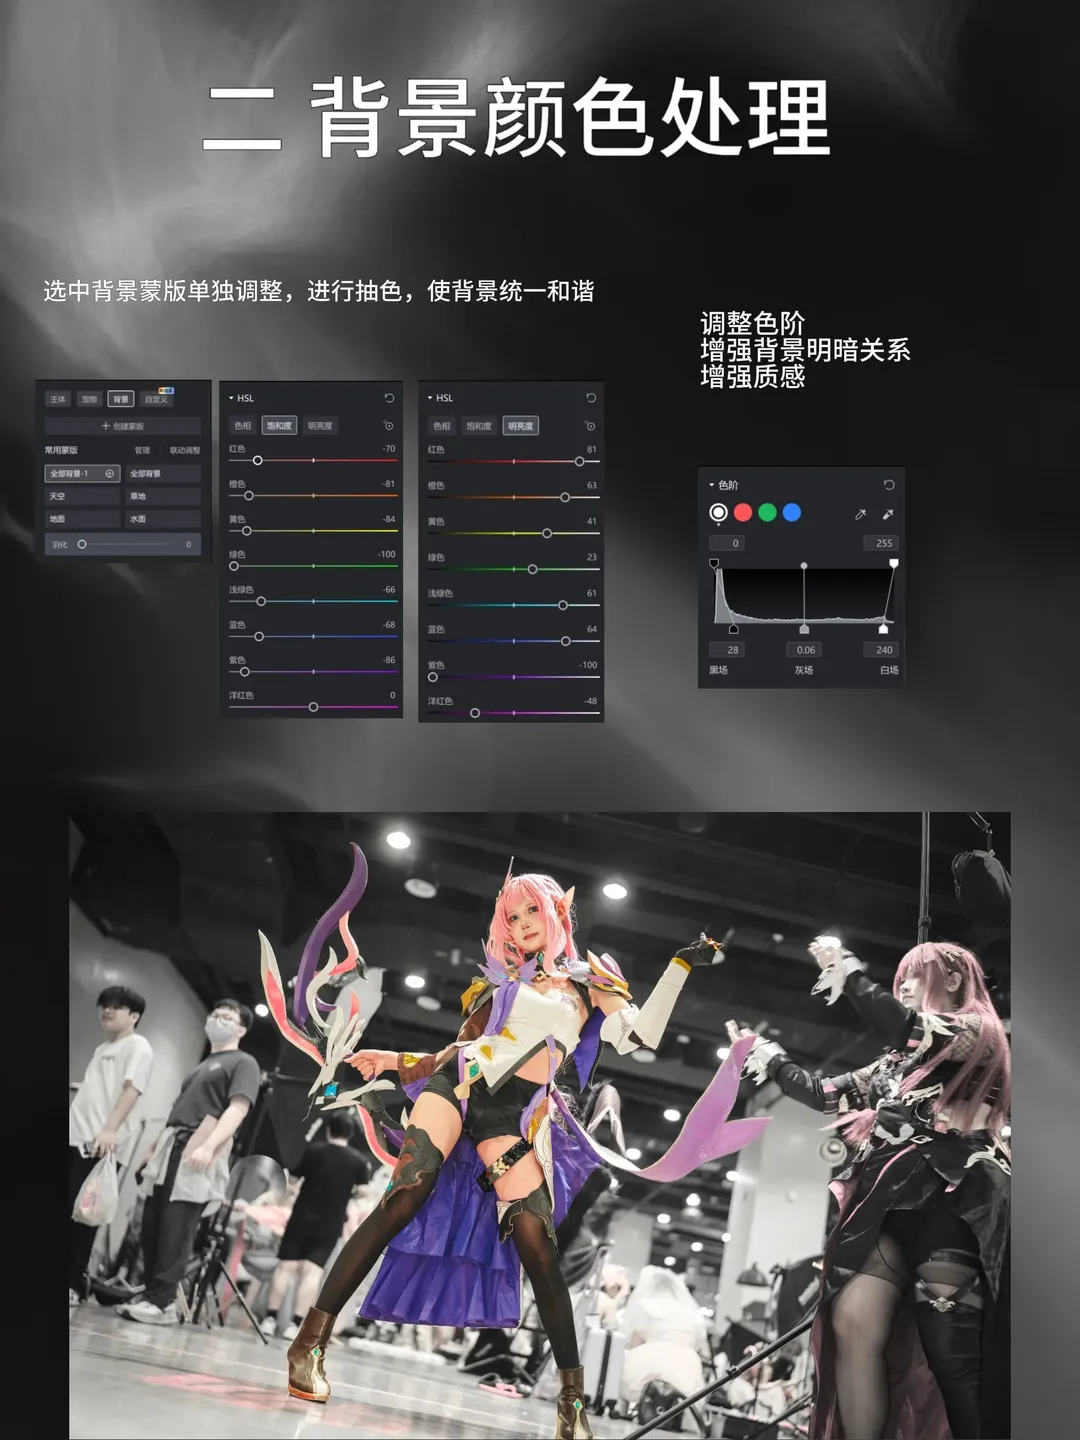
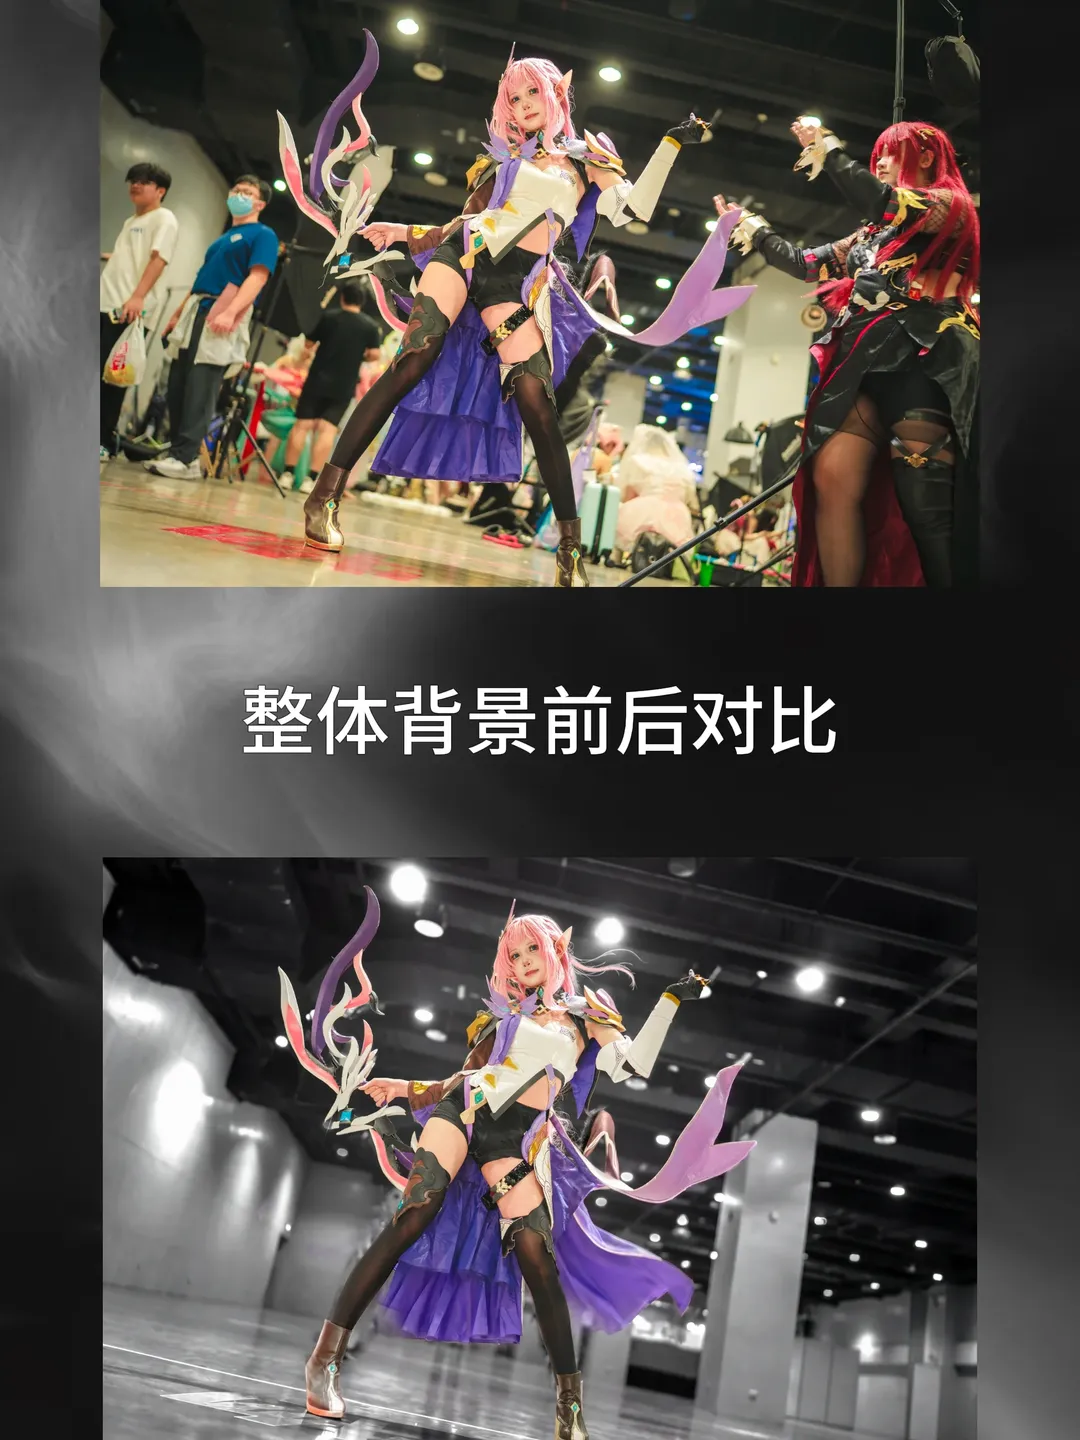
Step 2: Background color management. Anime convention floors often reflect intense glare alongside colorful signage, outfits, and crowds, compromising overall image aesthetics. Therefore, I isolate the background mask to desaturate it into neutral monochrome tones so it doesn't distract. Adjusting levels then enhances contrast and texture across the background, making the subject stand out.
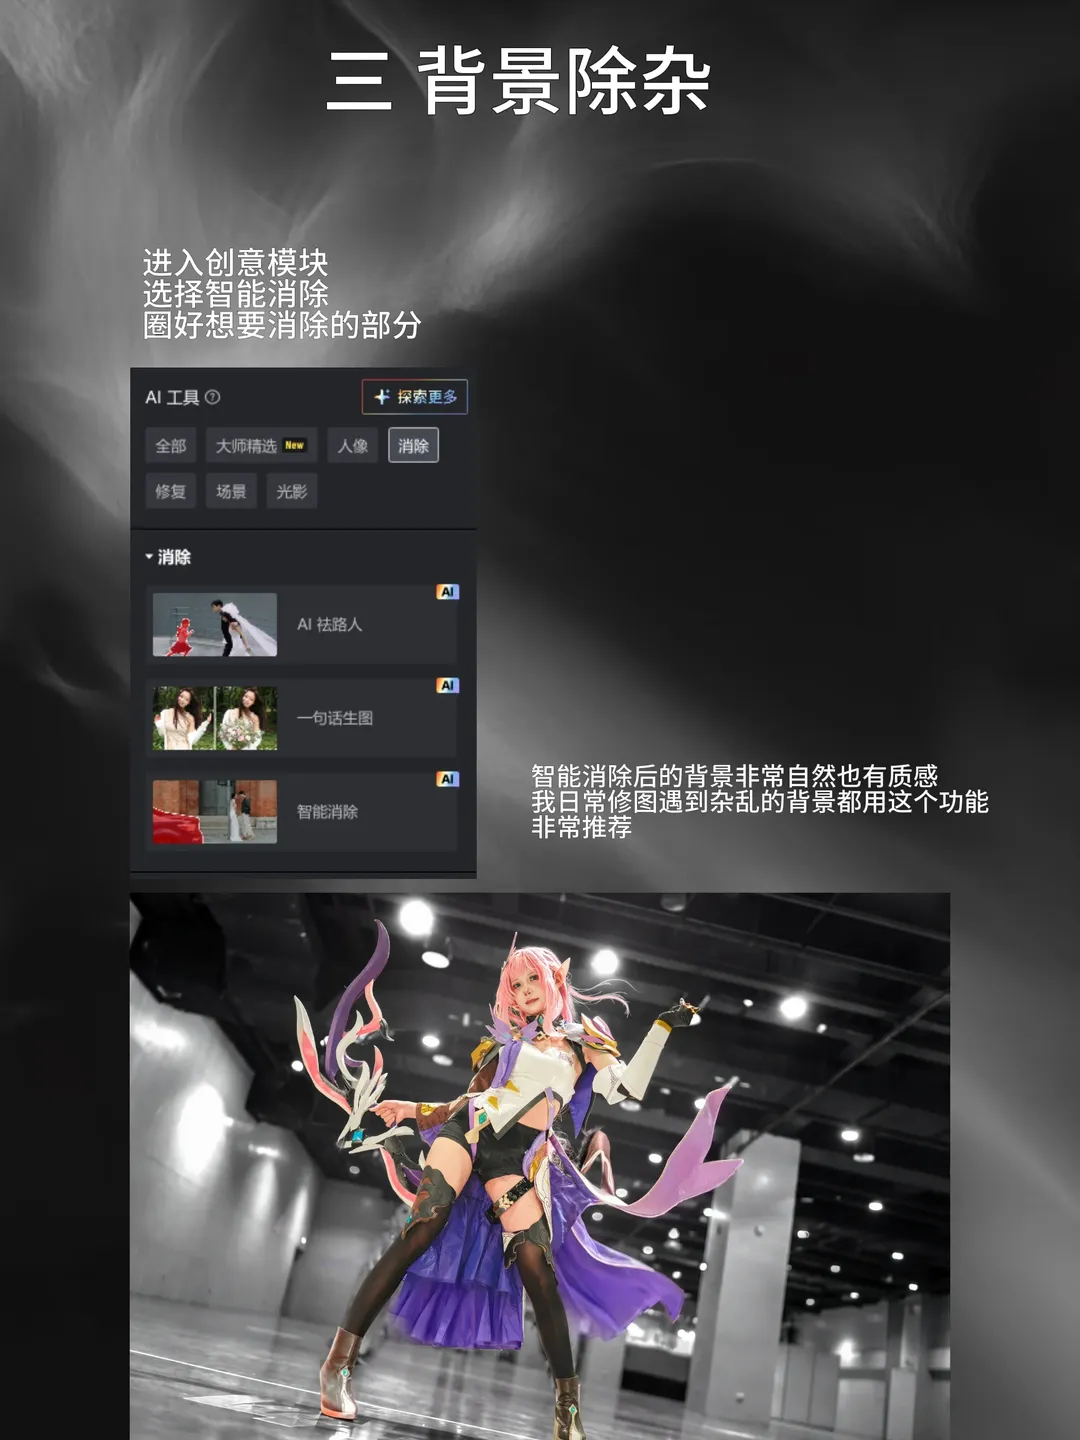
Step 3: Background cleanup. For this step, I utilize smart AI object removal to circle nearby cosplayers, passersby, and floor clutter. The AI-generated background blends seamlessly without obvious clone-stamp smudges, flawlessly restoring the floor's original smooth texture. It saves immense time compared to manual clone-stamping, and I highly recommend this feature.
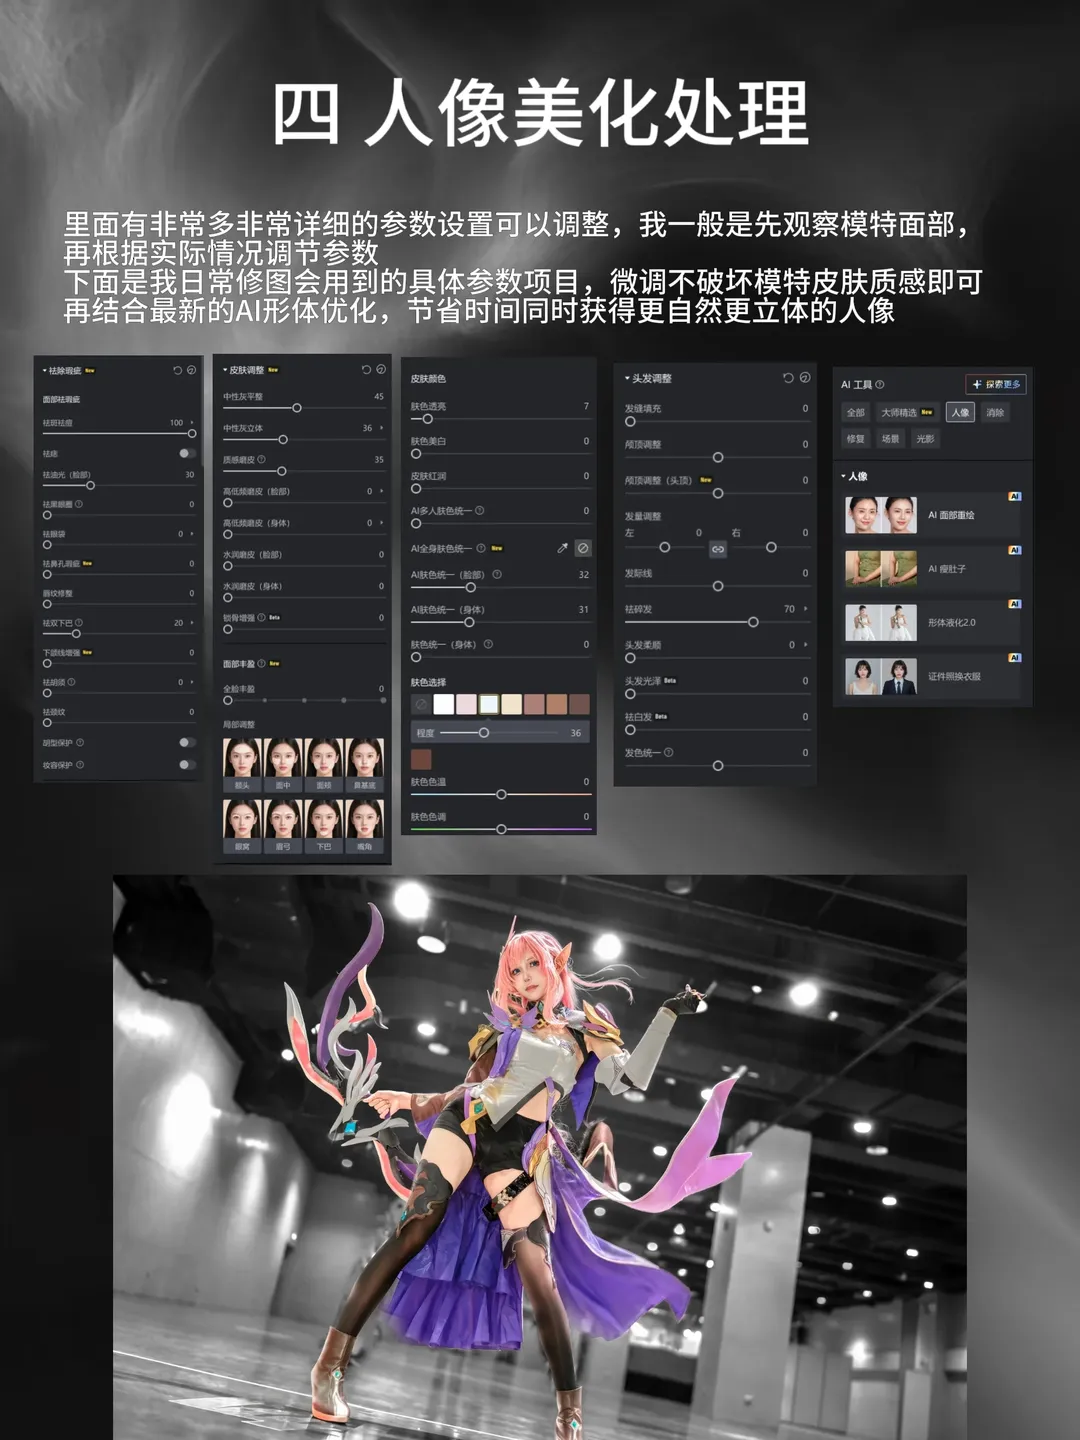
Step 4: Portrait enhancement. I begin by assessing the model's facial features and subtly tweaking parameters—never overdoing it to preserve natural skin texture. I use the liquify tool for slight adjustments to the face and silhouette, followed by skin tone restoration to create an even, radiant complexion, correcting uneven lighting from the venue. Finally, facial sculpting brightens the eyes and enriches lip color, while the AI hair tool cleans up frizzy flyaways to render the overall cosplay look cleaner and more three-dimensional.
To conclude, photo retouching isn't magic; it is about restoring the beauty meant to be captured. Since this set doesn't specify a character, I won't name one. In a packed Anime convention, capturing a well-composed frame is already rare, and post-processing ensures that genuine feeling is perfectly preserved. I hope this PixCake Photo editing tutorial and methodology proves helpful to everyone!